• Prevent Window Collisions

    Prevent Window Collisions

    What is the bird-window collision problem?

    Hundreds of avian window collision victims are admitted to the Wisconsin Humane Society Wildlife Rehabilitation Center each year, and it is estimated that between 300,000,000 and 900,000,000 birds die each year in North America from building collisions alone!

    Navigating around glass is a foreign concept for birds, as no non-manmade substance functions like glass in quite the same way. When they encounter it, birds either become exhausted and disoriented attempting to navigate around it, try to “fly through” the landscape reflection that they see in the glass, or try to fly through the “tunnel” to gain access to the other side, since they can’t “see” the glass until it is too late.

    These birds already face a wide variety of threats, including habitat destruction here and on their wintering grounds in Central and South America. With so many challenges already facing these birds, it is vital that we help to make our communities safe for the thousands of migrating birds that pass through our area in the spring and fall, as well as the resident birds who are with us all year long. 

    How to Help

    It can be quite distressing to find a grounded or unconscious bird, but your swift action could potentially save a life. Use the button below to read step-by-step instructions on what to do if you’ve found an injured bird in need of help.

    Window clings are an effective way to break up the reflective surface that can be so misleading to birds. They generate a UV light that acts as a glowing stop sign to birds, but is undetectable to us humans, letting us maintain clear sightlines from inside the home while protecting our avian friends outside.

    Thanks to our friend and avian advocate, Jeff Rusinow, you can purchase window clings at a heavily discounted rate through our Animal Antics retail store while supplies last! We also offer Whispering Windows®,  WindowAlerts, and CollideEscape Bird Tape.

    • To keep birds from seeing in one window and out another window, simply close the blinds or curtains on one of the windows. Without obscuring the window, birds often think they can fly through these “tunnels” and are injured or killed as a result.
    • Break up reflections on your windows by applying window clings/decals or tape. You can purchase heavily discounted window clingsWhispering Windows®,  WindowAlerts, or CollideEscape Bird Tape from our online store. In some cases, to be fully effective, clings may have to be placed as close as 2″ apart. See this instructional video for instructions on how to correctly apply your clings.
    • Hang brightly colored, fluttering ribbons, such as Irritape holographic Mylar tape, in front of windows.
    • Hang vertical strips of parachute cord, such as Acopian BirdSavers, in front of your windows.
    • Or, tie unwanted compact disks (CDs) hanging on a string in front of the window so that they turn in the wind.
    • Install fine-mesh plastic netting in front of windows. Leave a few inches between the glass and the netting to allow birds to collide softly with the mesh instead of hitting the glass.
    • Eliminate reflections completely by applying CollidEscape® film to the outside of windows. 
    • Reduce the risk of window collisions for birds visiting your feeders by placing them either very close (within three feet) or at least ten yards away from windows.
    • Lower window awnings to shade your windows and reduce reflections.

    Tall buildings and buildings located on “migration corridors” — like lake shores, rivers, greenways, or ridges — can minimize or extinguish lighting between 11:00 p.m. and 7:00 a.m. during migration periods (mid-August through October, and mid-March through May). This includes lighting visible through exterior windows and exterior vanity lighting. Tall buildings that use the “lights out” guidelines may save, in addition to the lives of many birds, hundreds of thousands of dollars on their energy bill and significantly reduce their building’s carbon footprint!

    Night-migrating birds may be attracted to brightly lit buildings. You can reduce the likelihood that they’ll be attracted to yours by:

    • Utilizing motion detectors to control lights when lighting is necessary. 
    • Scheduling night cleaning to reduce the amount of time lights are needed. 
    • Programming light timers to fit hours of operation and cleaning. 
    • Reducing perimeter lighting. 
    • Installing lower-intensity lighting. 
    • At night, move activities requiring light to interior rooms or use low-intensity task lighting, like desk lamps.
    • For specific areas where birds collide during the daytime with windows on the bottom 3-4 stories of your building, you can install heavily discounted window clingsWhispering Windows®,  WindowAlerts, CollideEscape Bird Tape or other treatments to reduce collisions.

    Is your company considering constructing a new building or planning to renovate an existing building?  Please help keep wild birds safe by incorporating “bird-friendly building design” into your plans!

    Learn more about bird-friendly building design from the American Bird Conservancy. 

    We encourage you to coordinate with teachers, administrators, building support staff, and other students to make the biggest impact. You can propose many of the tips mentioned in the “preventing collisions at work” section above, including the application of collision-preventing window clings.

    You can also take action to reduce bird collisions at your school or campus by becoming a bird-safe classroom! By playing these fun, informative, interactive games, students and faculty alike can learn about the challenges facing wild birds and the ways we can help support them.

    Large cities can be dangerous for migratory birds, and they need your help! Migratory birds are disoriented by reflections on glass and mirrored window surfaces, glass walkways, and bright lights that illuminate the night sky. That’s where WIngs (Wisconsin Night Guardian for Songbirds) Bird Collision Monitors step in to rescue these fallen birds.

    Through a partnership between the Wisconsin Humane Society Wildlife Rehabilitation Center and Urban Ecology Center, volunteers patrol areas of downtown Milwaukee in the early morning hours during periods of peak migration (Spring: mid-April and May; Fall: September and October), while also tracking specifics as to where and when birds were found. Injured birds are then transported to the Wisconsin Humane Society Wildlife Rehabilitation Center by UEC volunteers for immediate, life-saving care. Additionally, the data collected from monitoring is utilized to better understand the window collision problem in Milwaukee and take steps toward reducing collisions in the future! Learn more about the impact of this important program here.

  • Getting Along With Gulls

    Getting Along With Gulls

    In recent years, gulls have become increasingly common in urban environments. Some species of gull are adapting to urban environments and are now nesting on gravel rooftops and in vacant lots, especially near water. Gulls have also learned to forage for discarded human food waste at landfills and wherever it can be found in urban areas.

    Conflicts usually arise during nesting season when adult gulls may swoop down at people in an effort to protect their nests or chicks, and their nesting colonies can be very noisy and smelly. Other concerns include gull droppings on cars, boats, piers, and around businesses, and beach sanitation and water-quality issues.

    Gulls, like all migratory birds, are protected by state and federal laws, and actions such as removing gull eggs or harassing the gulls to try to get them to leave during nesting season are illegal (without a special permit issued by the US Fish and Wildlife Service). Read below for important tips and tricks for coexisting with the gulls who share our habitat.


    FAQs & Humane Solutions:


    Be sure to keep the dumpster lids closed at all times, and make sure that all garbage makes it into the dumpster, not on the ground nearby. Any garbage on the ground or in an open receptacle will attract foraging gulls.

    The gulls are swooping down because they believe your workers are a threat to their nests and young on that or a nearby roof. You may want to postpone doing the work if it is reasonable to do so. The gulls only defend their nesting area during the spring and early-to mid-summer nesting season. Once their young have fledged, they will disperse from the rooftop nesting area.

    If the work can’t be postponed, using the following method usually works well to let your workers get a quick job done: One worker does the actual repair work while another serves as the “gull spotter.” The latter’s sole duty is to watch for approaching gulls and fend them away from the person doing the work. Both workers should wear hard hats and face or eye protection. The gulls seldom actually make contact with an “intruder,” but it’s better to be safe than sorry. A good tool for fending off gulls is a large, hand-held umbrella, especially a brightly colored or patterned one. The spotter holds the open umbrella over their head and waves it to scare away any approaching gulls while the other worker does the work. Even better than the “umbrella method”, erecting a pop-up canopy or suspending a tarp over the area being worked on helps deter the gulls and adds another layer of protection for the workers. The tarp or pop-up canopy is elevated a few feet off the ground; the lower the better. If reasonable to do so, the workers can kneel under the canopy situated just over their heads to do their repair work. For even more protection, covering one or more sides of the canopy should provide further concealment and protection for workers.

    If you have questions, please contact our Wildlife Rehabilitation Center staff at 414-431-6204.

    Gulls, like all migratory birds, are protected by state and federal laws, and actions such as removing gull eggs or harassing the gulls to try to get them to leave during nesting season are illegal (without a special permit issued by the US Fish and Wildlife Service). If you believe the gull’s activity poses a real risk to human safety and you cannot postpone the work or use the techniques described above, or they have not worked to your satisfaction, you are welcome to call us at (414) 431-6204 for further advice. Or you may call the United States Department of Agriculture Wildlife Services office in your state for more information about how you might obtain a permit. 

    If it is summer, this is likely an infant or juvenile gull. Gulls often nest on rooftops and vacant lots in the city. These young birds are flightless for weeks after hatching and learn to fly from the ground up, so it is very common to see them walking in or around streets, sidewalks, and parking lots when they wander away from their nest site.

    If you see adult gulls coming down near the juvenile, it is likely being cared for, and it doesn’t need human intervention. However, if the gull is in the street or otherwise in danger, or appears to be injured, you may choose to intervene. If you do choose to help, please be very careful and use your best judgment to protect your own safety and the safety of others. You may be able to hold a shirt or towel out in front of you to herd the bird to safety. Please, if it is not safe for you to intervene, consider calling the police or a licensed wildlife rehabilitator for help. If you are uncertain about a situation, call a licensed wildlife rehabilitator in your area for advice. If you are in Milwaukee County, call us at (414) 431-6204. If you choose to capture the bird, you can refer to our Sick or Injured Birds page for tips.

    In some cases, local bird droppings (gulls, geese, ducks, and pigeons) can be a significant contributor to elevated bacteria levels in beach water. Such is likely the case at Milwaukee’s South Shore Park beach where an expansive asphalt parking lot attracts these birds as a resting area. Rainwater then washes their waste into the adjacent sand and water. But “non-point source” pollution may also play a significant role. This is when pollution from diffuse sources, such as fertilizers, pesticides, and animal waste from agriculture and suburban and city lawns and streets, and human waste from sanitary sewer leaks and overflows upstream, gets washed into rivers and streams by rainwater and snow-melt.

    Also, factors such as water circulation adjacent to beaches and the proximity of stormwater run-off points to the beach can play a role. Using habitat modification — changing some of the landscape features adjacent to and on the beach — can make the beach and adjacent areas less inviting to the birds. In the case of South Shore Park’s beach, officials will be modifying the expansive asphalt parking lot and adding dunes to the upper beach to make the area feel less “safe” for these birds to reduce their use of this area as a hangout. They are also using a beach-grooming machine, which turns over the beach sand, exposing lower layers to the pathogen-killing effects of sunlight.

    In southern Wisconsin, you should begin watching for gulls congregating on the roof starting in late February and into March and early April (in milder weather, the gulls tend to show up earlier). These birds may be checking out the area for nesting weeks later. Before the birds actually lay eggs, it is legal and humane to take action to get the birds to leave and look elsewhere for a nesting spot. The options available to you fall under these three categories: Habitat Modification, Repellents, and Exclusion. Using a combination of techniques is often needed to obtain the desired results.

    1. Habitat modification:

    • Reduce or eliminate nearby food sources or the bird’s access to them. Sources of food for gulls include garbage at dumps or landfills, near restaurants, and at food processing plants.
    • Manipulate the height of vegetation on a potential gull nest site by reducing or eliminating mowing (if allowed). Dense vegetation that is taller than the standing gulls may reduce their ability to see approaching predators. This can make them feel insecure and cause them to abandon the area.
    • Drain or otherwise eliminate puddles and pools of standing water that attract gulls. (IMPORTANT: Don’t do this when there are baby gulls present. They are too young to fly and are dependent on water sources in or adjacent to their nesting colony to survive.) Bird droppings are just one of several sources of contaminants that can negatively affect water quality at swimming beaches.

    2. Repellents/Scare Tactics:
    These work best if started well before the gulls get attached to a potential nesting site. Habituation (getting so used to something it is no longer frightening) by the birds is common when using repellents or scare tactics, especially those that don’t move or change in some way, so it is best to use more than one of these methods, change the type or location of the scare tactic, and use them in combination with habitat modification and/or exclusion for best effect.

    • Mylar tape – (Bird-X™ Irri-tape)
      Hanging strips of Mylar tape that move and shimmer in the breeze can scare the birds away from some areas. One could also hang unwanted CDs to try for the same effect. Habituation can occur, so make sure to change the objects and their location often.
    • Predator Kites
      Flying kites or balloons resembling avian predators (e.g. hawks, falcons) can keep birds away from an area. But like all scare tactics, habituation to them can happen, sometimes in just days or even hours, so you’ll need to vary the location of the kites to maintain their effectiveness.
    • Noisemakers
      Using loud sounds or other audible stimuli can effectively get birds to leave an area. However, their use is somewhat limited in urban areas due to the disturbance they can cause to people in nearby homes and businesses. Noisemakers can be as simple and inexpensive as banging pots and pans together in your hands, or as elaborate and expensive as automatic propane “exploders” and playing recorded bird distress calls on loudspeakers. The use of pyrotechnics such as “shell crackers,” “screamers,” and the like should be left to wildlife management professionals.
    • Methyl Anthranilate – (e.g. Fog Force® NIXALITE)
      This is a non-toxic bird repellent (also used as an artificial grape flavoring in human foodstuffs) that tastes bad to most birds. For gulls, this product is usually applied as a fog that is created upwind from the gulls one wants to repel. The breeze carries the fog to the gulls. The gulls associate the bad taste of the fog with the location and often avoid it in the future. Various types of foggers are available for this purpose, including propane foggers, electric foggers, automatic foggers, and compression tank sprayers. Fogging needs to be repeated as needed to repel new or returning birds.
    • The Scarecrow® motion-activated sprayer
      Hooks up to a garden hose and scares away birds entering its sensor area by blasting them with a harmless, though frightening, blast of water.

    3. Exclusion

    • Anti-gull colony String Grid
      This is a grid of fishing line or wires (usually stainless steel) mounted on poles so the string or wires are several feet above the ground over an area one wants to protect. For rooftops, the string or wire is usually attached to plastic or fiberglass poles and spaced 10 to 15 feet apart. The grid works because the gulls don’t like to fly through the network of lines or wires. IMPORTANT: A grid must be erected before the gulls begin nesting. Grids of wire or fishing line spaced as wide as 30 feet apart have been shown to keep gulls away from garbage dumps, if the food attraction is not too great. Wire spacing of 15 feet was successful in keeping most gulls away, even when the food attraction was great. Wire grids with a spacing of 30 feet have successfully kept gulls away from fish-farming ponds.
    • Bird Spikes
      Gulls can be dissuaded from perching on ledges and walls by using “bird spikes,” sometimes called “porcupine wires.” These are strips of bristling metal or plastic wires or spikes that make it very uncomfortable for gulls to land on surfaces to which they are properly applied.
    • The Bird Spider®
      The Bird Spider does look somewhat like a wire spider with long, curved wire “legs” radiating from a central mounting point. This product can keep gulls from perching on poles, street lights, boat cabins and other areas up to several square feet in size.
    • Bird Netting
      Weather-resistant netting with a mesh size small enough to keep a gull from passing through it is draped, or erected on a framework, over or around an area one wants to protect. Such netting and related supplies are available online, and some professional “nuisance wildlife control operators” are equipped to install bird netting.
    • Hire Help
      If you are unwilling to tolerate or unable to haze the gulls yourself, there is the option to hire a humane animal removal company to do the work for you. For more information on choosing the right company for the job, click here

    See above for exclusion techniques and repellents/scare tactics that can help keep gulls off your boat and dock. Temporary mounts, including a handy sandbag-type base, are available for The Bird Spider® and similar devices for use on boats and other applications. Don’t waste your money on a plastic owl or an inflatable snake: the birds quickly learn that these static animal effigies are no threat and will ignore them. Fishing line or other string strung above likely gull landing areas is reportedly quite effective.

    Restrict Gull Feeding: People feeding gulls intentionally or unintentionally (e.g. cleaning fish at dockside and tossing the entrails in the water) in the general area around your boat can attract gulls, which may hang around waiting for another handout.

    Especially in urban environments, it’s not uncommon to receive complaints about cars getting covered in gull excrement while at work. You may have to walk a bit further from your car to work, or pay to park in a covered parking structure, but if you can reasonably find a parking place in a “safer-from-gull-poo” location, it might be worth the extra effort or cost – especially if you are particular about protecting your car’s like-new finish.

    If parking elsewhere is out of the question, you might consider covering your car, or at least the areas most likely to be “hit,” such as the roof, hood, and trunk lid. Commercial car covers are available at auto supply stores and online. Instead of buying an actual car cover, you may want to first try covering vulnerable areas of your car with a blanket or other thick fabric while it is parked.

    If your car is pooped on, it helps to wash it off quickly, before the hot sun bakes it on and the acidic poo possibly damages the car’s finish. There are a variety of methods offered online for the “best” way to wash bird droppings off your car. Most involve soaking the poop with a water-soaked cloth or paper towel to soften it, and then “pinching” the poop with your fingers through the cloth or paper towel to lift it from the surface. Some suggest that wiping the mess off rather than lifting it off might scratch the finish due to a fine grittiness that may be present in the dropping.

    There are also a variety of commercial bird-poop remover liquids, special protective car-finish waxes, sealants, glazes, and films available. You may want to talk to your car’s detailer, dealer, or manufacturer for their recommendations for protecting your car’s finish and removing bird droppings.

    Note: Birds don’t really produce urine as mammals do. Instead, they produce uric acid, which collects in a chamber called the cloaca (they don’t have a bladder). In the cloaca, excess water is reabsorbed. The remaining pasty white stuff is expelled with their droppings. Thus, in bird “poo,” the white stuff is uric acid and the brown/green/black stuff is the actual fecal matter.

  • Coexisting with Coyotes and Foxes

    Coexisting with Coyotes and Foxes

    Canids, like coyotes and foxes, are versatile, intelligent, and adaptable to most habitats. Over the last 100 years, coyotes and foxes have expanded their range and can now be found living across the country, even in America’s most densely human-populated areas, and Milwaukee is no exception. Coyotes and foxes typically see humans as predators, and while the vast majority of their activity happens after dark when human activity is at its lowest, daytime activity is not uncommon. Negative interactions with canids are often the result of habituation, or the process by which coyotes and foxes lose this innate fear of humans due to the abundance of food and lack of negative interactions with people. Maintaining a healthy relationship dynamic by minimizing the things we do to attract canids in conjunction with hazing techniques provides the best context for positive interactions with these resourceful creatures.

    Keeping Coyotes and Foxes at a Distance

    Coyotes and foxes thrive in cities where habitat resources (food, water, and shelter) are abundant. Take the following steps to prevent them from being attracted to your home:

    • Secure garbage cans by fastening lids with rope or bungee cords.
    • Dispose of especially attractive food wastes such as meat, cheese, and eggs by adding a small amount of ammonia to the bag.
    • When composting, use enclosed bins rather than exposed piles. Avoid adding dog or cat waste, meat, milk, or eggs to compost.
    • If you have fruit trees, pick the ripe fruit and keep fallen fruit off the ground.
    • Motion-sensing lights or sprinklers may deter them from your yard. A motion-sensing sprinkler, the “Scarecrow,” is available online and in stores.
    • Clear bushes and weeds away from your home. Dense vegetation provides an attractive habitat for animals on whom coyotes and foxes prey.
    • Maintain a clean outdoor cooking space to minimize attractants. Grease drip trays on grills will directly attract coyotes and foxes, as well as prey species.

    Keeping Companion Animals Safe

    Cats and small dogs may be seen as prey to a coyote, while larger dogs could be injured in a confrontation. To avoid these situations, consider the following:

    • Fence your yard. The fence must be at least six feet tall with the bottom extending at least six inches below the ground. Fences can be made more effective by installing a rolling bar across the top edge.
    • Keep companion animals in at night. Coyotes are primarily nocturnal.
    • Keep cats indoors where they are also safe from cars, other animals, and getting lost.
    • Don’t leave pet food outside.
    • Spay or neuter your dogs. Coyotes are attracted to and can mate with unsterilized domestic dogs.

    Trapping and relocation of coyotes and foxes is not recommended except as a last resort. Disruption of family packs can cause orphaned juveniles to seek easy prey, such as small dogs and cats, and other coyotes or foxes may move into the vacated area.

    Coyote and Fox Encounters

    Coyotes and foxes are usually wary of humans and will avoid people whenever possible. Aggressive behavior toward people is not normal and is most often a result of habituation due to feeding by humans. If you encounter a coyote or fox, remember the following:

    • Never feed or attempt to “tame” them.
    • Do not turn your back or run.
    • Attempt to leave the area calmly.
    • If followed, make loud noises and make yourself look big. If this fails, throw rocks or sticks in the direction of the animal, being careful not to hit them.

    Coyotes and foxes are not considered a disease threat. Outbreaks of rabies in wild canids are rare and not commonly implicated in the transmission of the disease to humans or companion animals.

    Hazing

    When implemented on a large scale, hazing can be one of the most effective ways to manage coyote and fox encounters in urban areas. The goal of hazing is to reverse the effects of habituation by associating humans with fear. If you see a coyote or fox, perform a hazing technique to begin building this association. 

    Hazing techniques generally fall into four categories:

    • Human behavior – yelling, waving arms, and clapping to scare the animal
    • Noisemakers – whistles, air horns, pots and pans, and “shaker” cans (pennies or stones in a soda can)
    • Projectiles – sticks, balls, small rocks (note: projectiles should be thrown in the direction of the animal, not intending to harm it.)
    • Other – sprinklers, spraying water at the animal with a hose

    Continue hazing the animal until it leaves the area, as stopping prior to this point will render that technique ineffective. 


    Modified and reprinted with permission of the Animal Protection Institute

  • Animal Removal Services

    Animal Removal Services

    The City of Milwaukee has nearly 600,000 human residents, but we are not the only ones who live here; millions of wild animals do, too. They were here first and may be here long after we are gone. Most of the time, we coexist with one another without much thought. Wild animals tend to be shy, avoiding human contact whenever possible. Occasionally, there are situations in which our interests and the interests of our wild friends come into conflict. Raccoons, for example, do not know that the snug hole they are nesting in is a chimney and that we would like to use our fireplace. They are simply trying to survive.

    Identifying the Problem

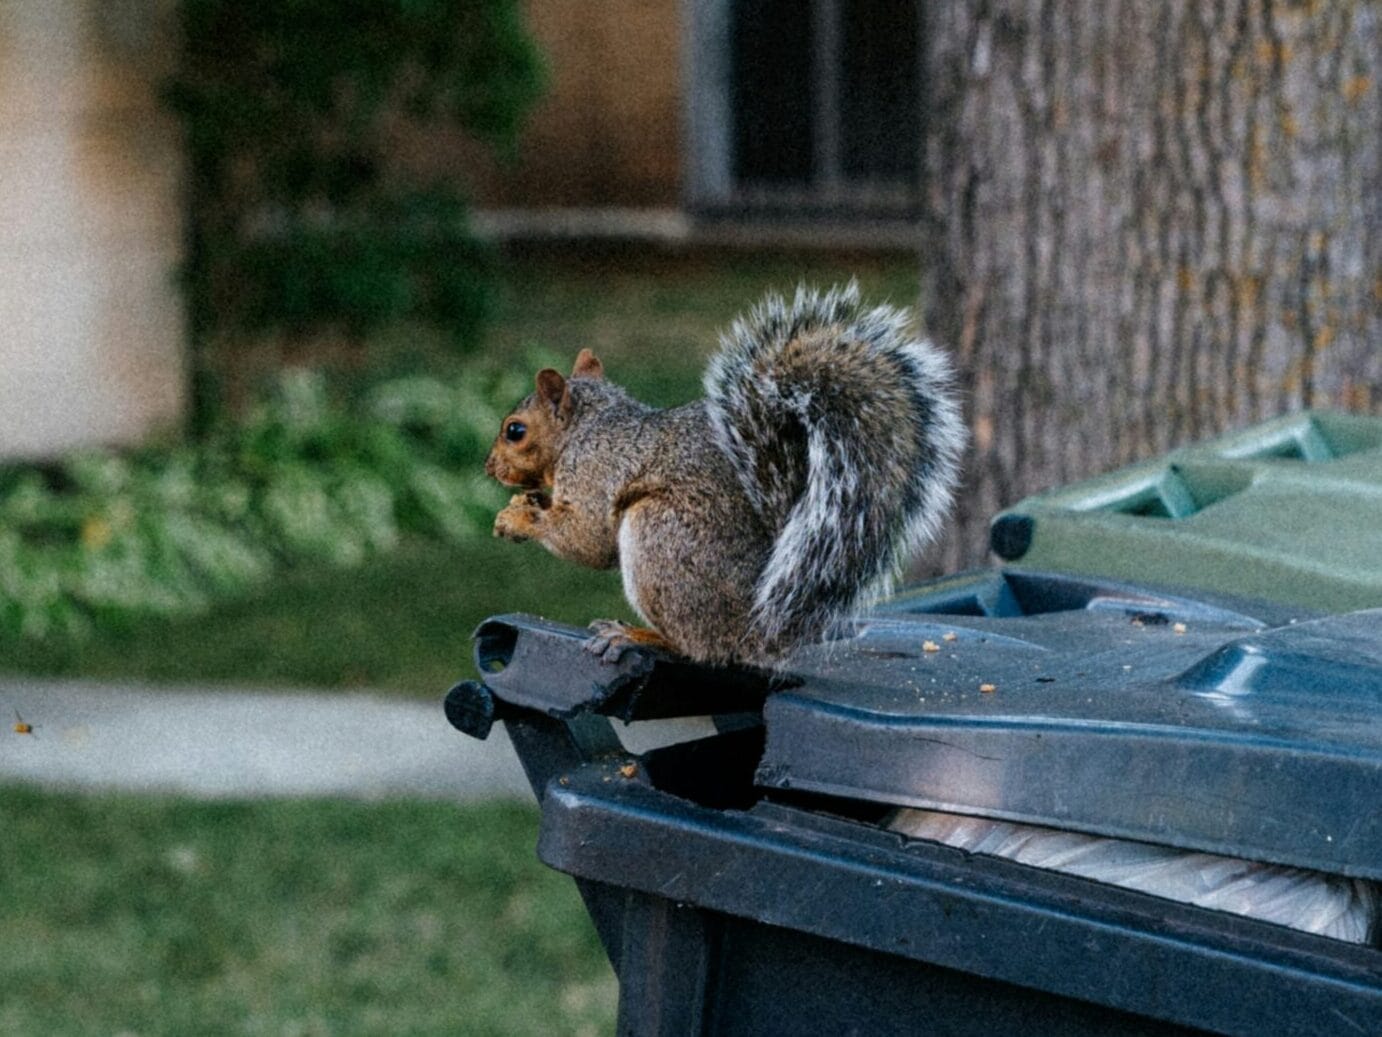
    It may be helpful to properly identify the cause of the conflict; it is actually often not an animal problem, but rather a building problem. For instance, if squirrels are living in your attic, it’s not a “squirrel problem,” it’s a “hole-in-your-roof problem.” The squirrel is just trying to survive and is instinctively utilizing the resources available to them. It is our responsibility to prevent problems before they begin by keeping our houses in good repair and closing off access points.

    Finding a Solution

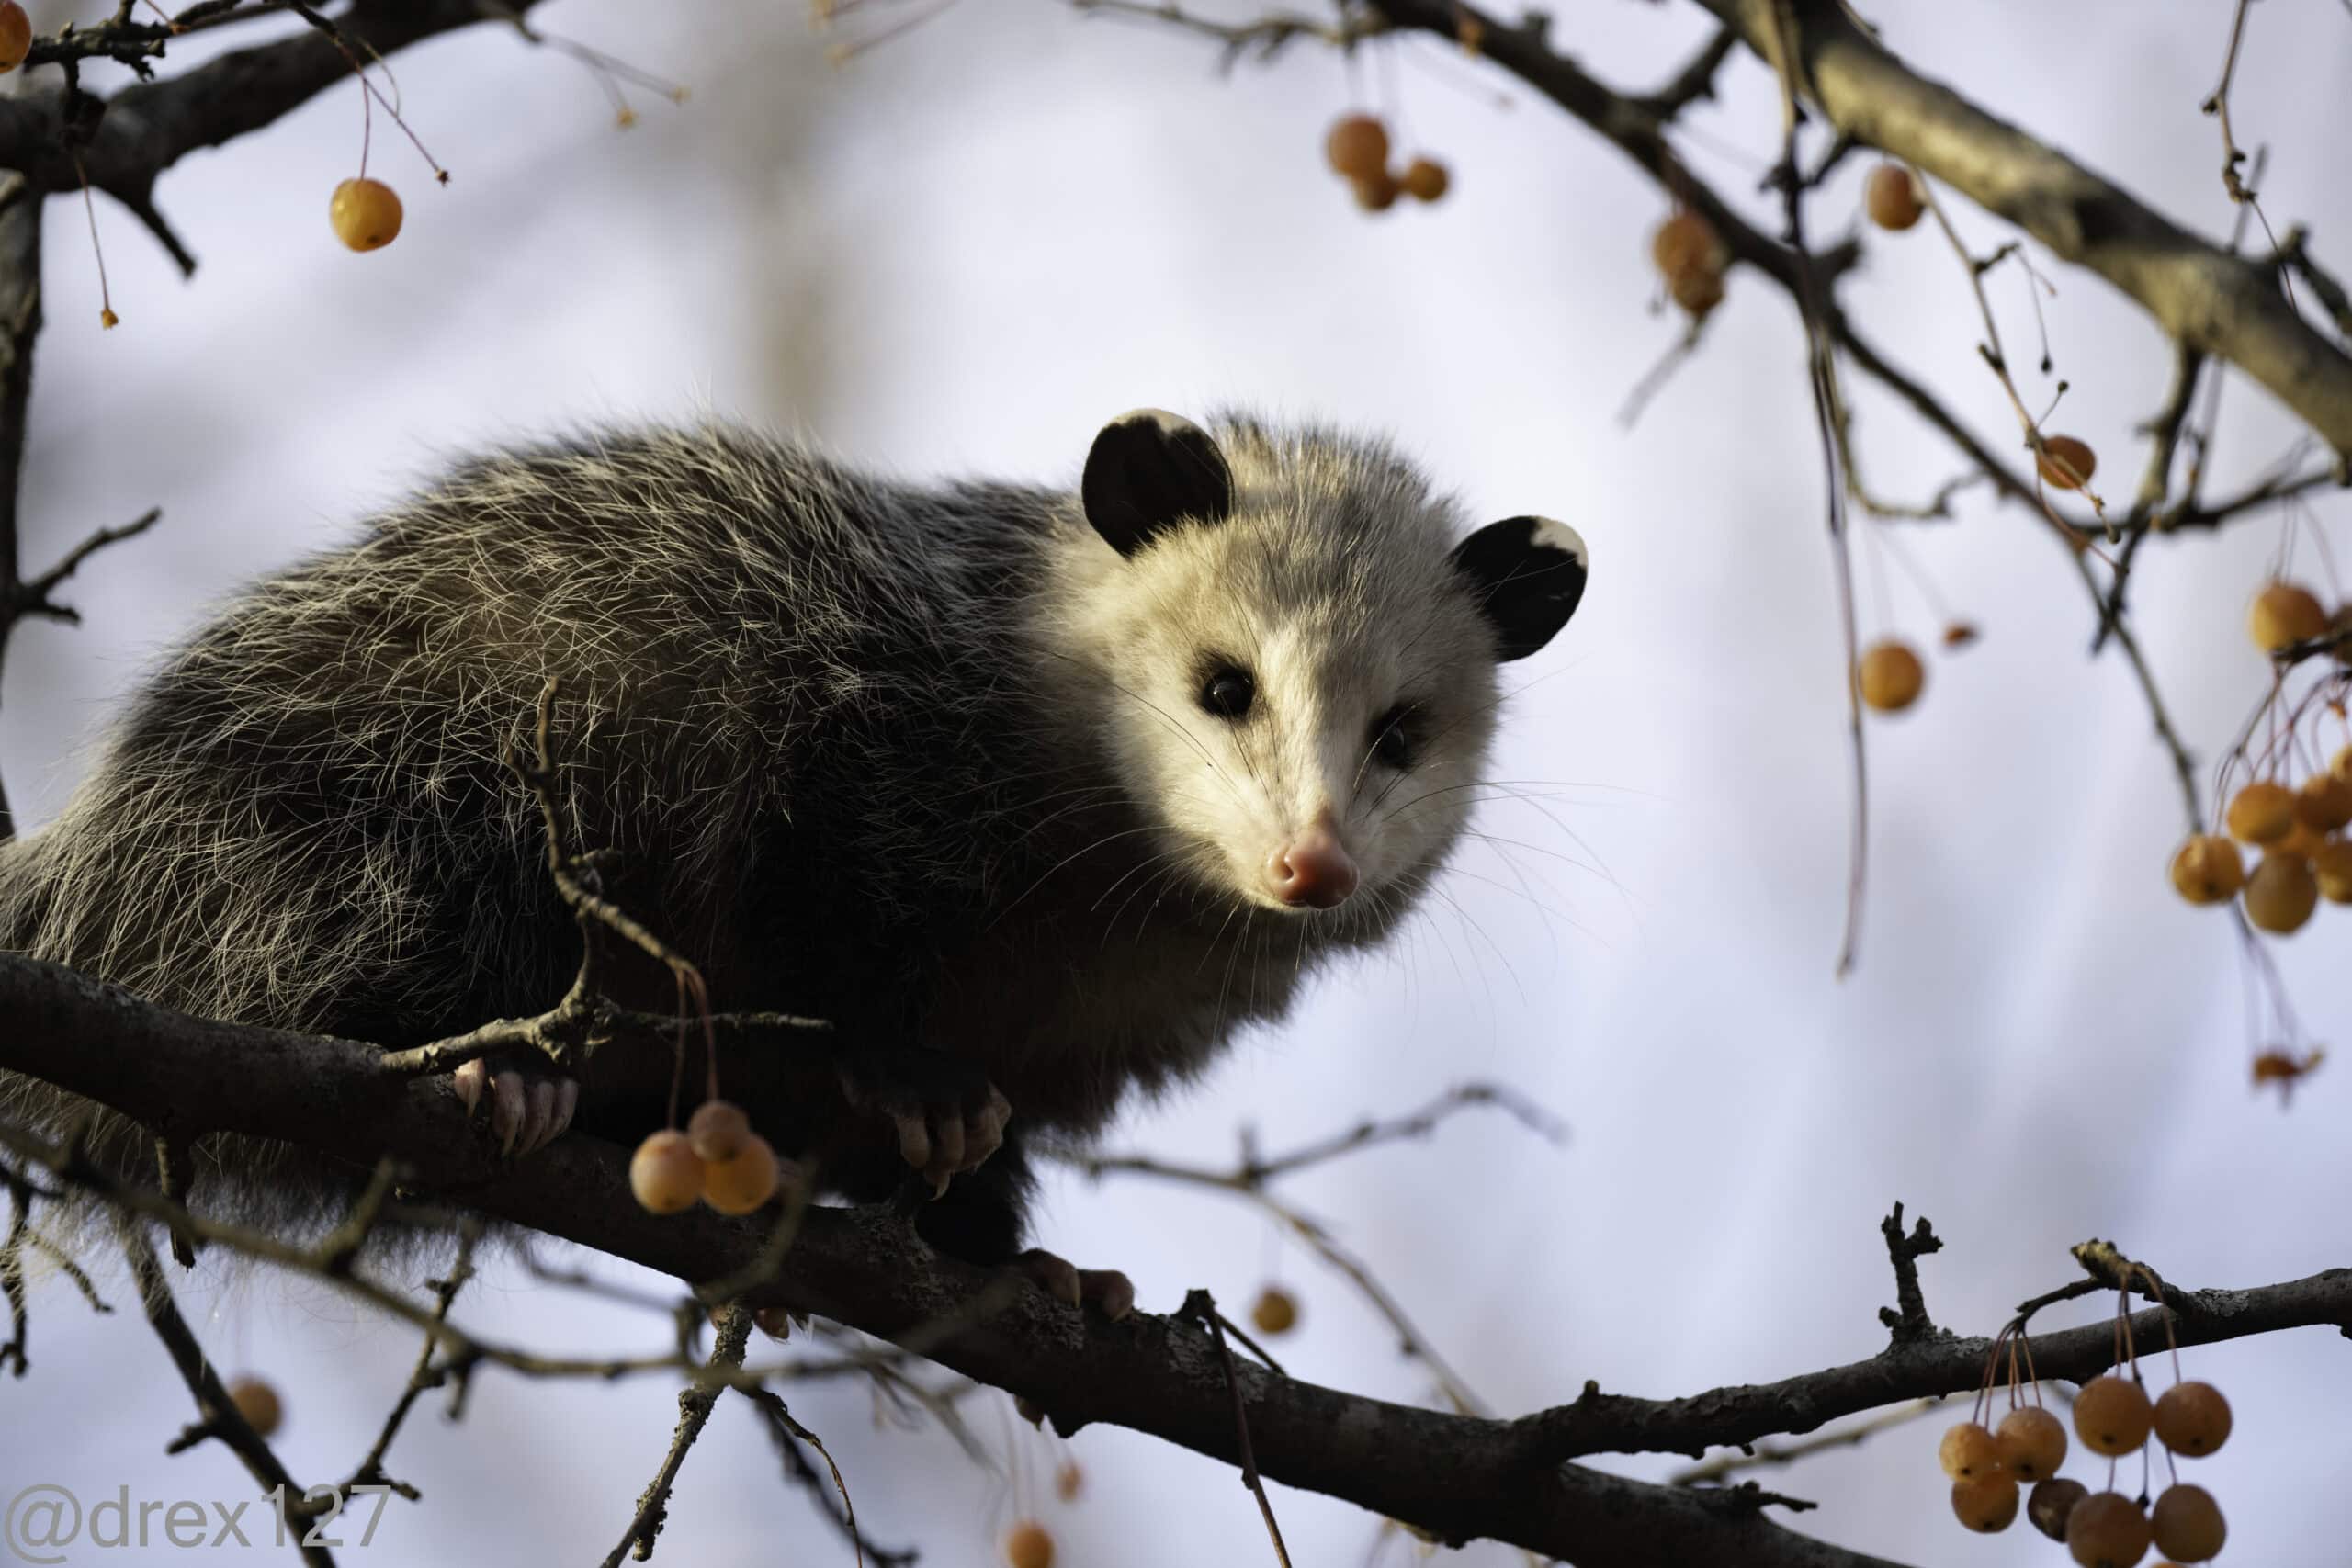
    The Wisconsin Humane Society recommends three humane solutions to most conflicts with wildlife: tolerance, hazing, and exclusion. More often than not, a little compassion and tolerance may be the best solution. While an opossum living under your porch might seem unusual to you, they do not usually cause any structural damage and do not pose a serious threat to you or your family. In this situation, it is probably best to simply leave the opossum alone.

    There are situations, however, that may require intervention. Squirrels are very cute when they live in trees, but can be noisy and destructive inside your house. We recommend a two-part solution to these situations. First, utilize hazing techniques to encourage the animal to leave. Second, once the animal is gone, seal their access point to prevent re-entry. The use of non-toxic repellants like Ropel or Liquid Fence, and scare devices such as Irri-Tape or the Scarecrow can also be used to keep animals at bay.

    Nuisance Wildlife Control Operators/Animal Removal Services

    If everything else fails, it may be necessary to contact a Nuisance Wildlife Control Operator for help. NWCOs are businesses that charge a fee for their animal-exclusion or live-trapping service. There are two types of NWCOs: those who utilize humane, biologically sound animal exclusion techniques, and those who primarily trap and remove animals. They are both likely to be listed under the heading of “Animal Removal Services” or “Pest Control Services” in your search results, so you have to ask questions to find out what kind of services a particular company offers.

    Humane animal exclusion companies can be hard to find. These services typically look at any wildlife problem “holistically,” identifying and correcting all of the factors that contribute to the problem instead of removing and/or killing the animal. This may include trimming back tree branches that allow animals access to the roof, installing exclusionary wire-mesh on other areas of the structure that animals may possibly use to try to get back into the building, and typically involves the use of one-way doors that allow the animals – in an attic, for instance — to get out but not to return. The area the animals are being excluded from will be thoroughly checked for baby animals. If babies are found, they are placed in a container at the adult animal’s exit location (now covered with a one-way door), so their mother can carry them to another den site. Later, the operator will return to make sure the mother indeed reclaimed her babies, remove the one-way door, and permanently close the former entry point.

    On the flip side, some “animal removal services” primarily use traps or poisons. If the animal does not die in the process, they are typically taken elsewhere for release, but are sometimes killed instead. These types of services should only be used as a last resort, and even then you should proceed with caution. Traps and poisons aren’t exclusive to just the targeted species — they can and often do lead to serious and sometimes fatal side effects for other unintended creatures. Leaving out a sticky trap for a mouse in your garage can be fatal to a bird who lands on it, and a poisoned rat can become a hazardous meal for a nearby bird of prey. Furthermore, simply removing the “nuisance” animal will not solve your problem; until an expert identifies and secures the entry points, you’ll find yourself back in the same predicament before long.

    If you are located in Milwaukee County, we suggest contacting Skedaddle Humane Wildlife Control. To learn more about their services, click here

    Questions to ask an animal removal service before hiring them:

    Can you offer a long-term solution that does not involve removing animals?

    Live-trapping will never permanently solve any conflict with wildlife unless animals are excluded from the problem area. If not, more will move in after one is removed. An animal removal service should be able to make recommendations to a homeowner in order to help them prevent future occurrences. For example, a service that will trap a raccoon living in your chimney, but does not recommend installing a chimney cap to exclude future intrusions, will not be effective. Ideally, a service should be willing to install the chimney cap for you and release the raccoon on its native territory, where it belongs.

    Can you ensure that you will ONLY trap the animals that are directly involved in the situation?

    To resolve a situation, only the animals who are directly involved in the situation should be trapped. If an animal removal service simply wants to set a trap outside in hopes that of the several animals they trap, one of them will be the target animal, call another service.

    What steps do you take to make sure that animals are treated humanely?

    Live traps should be checked at least every twelve hours to ensure that an animal is not stuck in them too long. Being contained in the trap can be quite stressful to an animal, and it may injure itself trying to get free. The trap should be set in a place that will ensure the animal’s comfort. For example, the animal should not be stuck in a metal trap exposed to the elements during the middle of winter. Likewise, an animal should not have to sit in the hot sun for hours in a trap. An animal removal service should take every step necessary to ensure that the animals it traps are treated as humanely as possible.

    What do you do with the animal after it is trapped?

    An animal removal service should be willing to release an animal back into its own territory after the situation has been resolved. Taking an animal far away to release is only acceptable if there are no other options. Removing animals from their home territory during the winter or baby season (see question below) can be a death sentence for the animal and possibly its offspring, even if the animal is released into a natural habitat. Animals should not be euthanized unless they are endangering public safety or the situation legally requires it. If a trapped animal is injured or sick, it is best to have the animal taken to your local licensed wildlife rehabilitator for evaluation.

    What do you do to prevent orphaning baby animals during the spring/summer?

    An animal removal service should be willing to check thoroughly for young or a nest before setting traps during the baby season (spring, summer, and early fall). They should also check every trapped female for signs of lactation. If young are present, an animal removal service should be willing to keep the family together. After excluding the mother from your house, she should be released back into your yard. The babies should be left in a warm, dry location where the mother will be likely to find them. For instance, place the young right outside the former attic entrance hole so that when the mom returns and discovers that she can’t get back in, her babies will be there waiting for her. She will move them to a new nesting site on her own.

    If you are located in Milwaukee County, we suggest contacting Skedaddle Humane Wildlife Control. To learn more about their services, click here

  • Geese Challenges & Solutions

    Geese Challenges & Solutions

    Once thought to be extinct, the non-migratory “Giant” race of Canada Geese was “rediscovered” in small numbers a few decades ago and thereafter transplanted widely across the US. Generations of their offspring have adapted to living happily in suburban and even urban habitats, grazing on the lush green lawns and swimming in the shallow ponds often found in these areas. But with their resurgence has come some challenges for the humans who find them in their shared spaces.

    Geese can leave abundant droppings, creating problems for parks, golf courses, and athletic fields. Their presence in large concentrations can also lead to shoreline erosion, habitat degradation, and water quality issues. Furthermore, geese can be very defensive when nesting and can become a potentially hazardous nuisance to humans when they nest in close proximity.


    FAQs & Humane Solutions:

    “Is it OK if I feed the geese in the park?”

    Feeding the geese encourages them to remain and concentrate in areas where their presence may be creating problems. This also makes them more prone to spreading diseases amongst themselves, to other wildlife, and even to humans. The geese generally don’t need handouts from people to survive. They have adapted to grazing on lush vegetation, such as grasses, and the large amounts of bread, corn, and similar foods people usually offer are of questionable nutritional value for the geese.

    In an attempt to control nuisance problems caused by geese, some municipalities, parks, and neighborhood associations have established ordinances or rules that forbid people from feeding geese. So if you insist on feeding, it’s a good idea to check your local ordinances and site-specific rules before you do so.

    “How do I reduce the amount of goose droppings in my yard?”

    There are a number of ways you can go about humanely resolving problems involving Canada geese. There is no one method that works in every situation. Utilizing a combination of approaches should help boost the success of your problem-solving efforts.

    Altering habitat is considered the most effective long-term approach to discouraging geese from an area. Methods include:

    • Visual barriers – For grazing, geese prefer a large, unobstructed lawn in close proximity to open water. Bushes and shrubs provide cover for predators to hide and limit visibility for geese, and this makes them feel uncomfortable. So planting bushes or even a hedge, adding large rocks, a wall or fence, or other obstacles to visibility can cause geese to avoid an area.
    • Less palatable plants – Young grass shoots, particularly of finer-bladed varieties such as Kentucky bluegrass, are preferred fare for geese. Less palatable plants such as native grasses and wildflowers, or tall fescue, common periwinkle, or English Ivy could eventually be substituted, if possible. If changing the composition of the lawn is not possible, you can make your lawn less “tasty” for the geese by watering less or not at all, reducing or eliminating the use of fertilizer, and allowing the grass to grow taller.
    • Exclusion means introducing barriers, whether physical (like an actual multi-wire or wooden fence) or visual (something that doesn’t physically prevent the geese from entering an area but which the geese do not want to cross).
    • Fences can deter geese from walking into an area. They need to be at least 30 inches tall and have no openings larger than 3 inches. Chicken wire, picket fencing, plastic mesh, mylar ribbon strips, and plastic snow fencing are examples of effective materials. Even simple barrier fences made by tying multiple strings spaced a few inches apart to vertical uprights, which are spaced no more than about 20 feet apart, can be effective. Fences are most effective if erected in early spring before nesting occurs or in early summer when geese have young and are molting their flight feathers and are unable to fly over the fence. Fencing is generally not effective in keeping geese off of large areas when they are flight-capable, because they can simply fly over the fence.
    • Repellents are chemicals designed to deter an animal from eating a particular food or from entering or living in a designated area. For discouraging geese, methyl anthranilate is a non-toxic, biodegradable human food ingredient that can serve as a taste-repellent when applied to grass. It is marketed under various brand names, one being Liquid Fence Goose Repellent®. These products are applied by spraying them on the lawn using the dilutions recommended by the manufacturer. The products should be reapplied every 7-14 days, after a rain, and after each lawn mowing.
    • Scare Tactics are non-chemical devices or activities designed to arouse fear or alarm to deter an animal from entering or lingering in a particular area.
      They include noisemaking devices such as the Goose B-Gone Super Sonic®, sirens, electronic whistles, etc.); visual deterrents such as Irri-tape® mylar tape, strobe lights, Scare Eye® balloons, coyote effigies, etc.; and devices that scare by other means such as the Scarecrow® motion-activated sprayer which frightens birds entering its sensor area by blasting them with a harmless blast of water. Then there’s the old-fashioned method of simply going out and making noise by banging on pots or pans, yelling, and waving your arms as you approach the geese.
    • Hire Help: If you are unwilling to tolerate or unable to haze the geese yourself, there is the option to hire a humane animal removal company to do the work for you. Click here for more information on choosing the right company for the job. 

    “What’s the best way to handle geese near shorelines or other water sources?”

    In addition to the methods discussed directly above, there are some other actions you can take that may prove useful:

    Shorelines – Geese prefer to walk, rather than fly, from land into water and vice versa. And they prefer to do so where the shoreline is gently sloped. They do not like to walk over rocks, nor do they like to have to push their way through dense shoreline vegetation to get in and out of the water. So to discourage geese from feeding on areas of grass near the water, to discourage them from using a particular portion of shoreline for entry and exit from the water, and to help stabilize the shoreline from erosion, a band of “riprap” (chunks of stone rubble) can be added to the shore at the waterline.

    Planting or encouraging emergent vegetation (growing out of the water, e.g., cattails) close to the shoreline and tall grasses or shrubs in a wide band along the edge of the shoreline will help prevent erosion and create a physical and visual barrier that the geese should not want to cross. Aesthetically, these offer the best solution; however, constructing a three-foot-high fence between the shoreline and adjacent lawn areas will also discourage geese.

    Aerators – Consider shutting off pond aerators in the late fall. This should help the pond ice over earlier, and without open water, the geese will be encouraged to move elsewhere.

    Discourage Feeding – Goose feeding done by residents or visitors can help attract and retain geese at your location, so it should be discouraged.

    “What is egg addling? Is it humane?” 

    Egg addling is a humane technique used to limit the reproduction of Canada geese. Addling involves locating goose nests in the early spring, very soon after the goose has started incubating the eggs, dipping each egg found in corn oil, and replacing them in the nest. The coating of oil on the egg stops the transfer of oxygen through the shell and thus stops further development of the barely-developed embryos. The dipped eggs are left in the nest for about two weeks. The goose will continue to incubate the eggs during that time. After two weeks, workers remove the now non-viable eggs from the nest. Because the goose has had two weeks on her nest, this satisfies her urge to nest, so she will not attempt to re-nest again that year. Without the two weeks on the nest, she would likely just start nesting all over again.

    Addling requires a permit from the Wisconsin DNR and should be employed only by those trained in its proper use, in combination with other goose management tools such as habitat modification, and only when non-lethal methods have been tried and shown to be less than fully effective. 

    “There is a goose attacking people who pass by my home or business. What can I do?”

    Canada Geese in urban areas will often choose nest sites in what seem to us humans to be less-than-ideal places, such as landscaped medians in parking lots, flat roof tops, and planters or landscape shrubbery on bridges or next to busy sidewalks. Of course, understandably, protecting one’s nest and offspring is a very basic instinct, and both parents will be very protective of the nest and eggs, and their goslings.

    A goose will lay one egg about every day-and-a-half and may lay up to 15 eggs (10 to 12 is more common). Once she is done laying all her eggs, she will then begin to incubate them together for about 30 days. So the longest the pair will be at the nest site is about 45 days. Once the eggs have hatched, the parents will walk their family to a nearby (but may be up to 2 miles away!) body of water, and they won’t return to the nest.

    We typically get several calls each spring from people who are having problems with a defensive male goose accosting people who are unknowingly passing near its nest site. In these cases the male goose’s strategy is to try to scare the “intruder” away by spreading his wings, hissing and running or sometimes flying toward the person. The goose doesn’t usually make contact with the person, but there are exceptions, and there is the potential for someone to get hurt. 

    Solutions:

    • Prevention
      Before the geese have laid eggs, you can encourage them to move along and nest somewhere else by treating the grass around the nest area with a goose repellent (see “Repellents” above). You can also use exclusion techniques (see “Exclusion” above) to deny the geese access to planters or other areas they have previously used or appear to be preparing to use for nesting. 
    • Construct a barrier
      Use at least a 4-foot-tall temporary fencing material, such as snow fence or plastic barricade fencing, between the sidewalk and the goose nest. This barrier should help give both the geese and people greater security. Keep in mind that fencing must not prevent the parents from getting to and from the nest, and must not prevent the goslings from leaving the nest area.
    • Signage
      Put up signs to warn pedestrians that there is a goose nest and protective parents ahead. Suggest options for other routes they can take so they avoid the geese.
    • Alternate Route
      Temporarily close the sidewalk that passes through the problem area. Direct customers to an alternate entry to your building.
    • Nest Removal?
      Canada geese are a protected species; once they have a nest with eggs, you cannot legally disrupt or move the geese or their nest without a special permit. Even if it were legal, geese are very unlikely to continue to incubate their eggs if they are relocated. If you are convinced that removing the nest or geese is the only way to protect human safety in your situation, contact the Wisconsin Department of Natural Resources.

    “What should I do if geese have nested in what looks like a dangerous location?”

    This has become very common in the Greater Milwaukee area in the last few decades. In more rural areas, geese will typically nest on raised muskrat houses in a marsh, or on an island or peninsula in a river, lake, or pond. Apparently, parking lot “islands” and raised planters in business and residential areas have enough similarities to attract urban geese to these unseemly nest sites.

    Solutions:

    • Prevention
      Prior to nesting, exclude (see “Exclusion” above) geese from using these locations, especially if they’ve used them in the past and you want to prevent them from using a location again.
    • Move the Nest?
      Canada geese are a protected species; once they have a nest with eggs, you cannot legally disrupt or move the geese or their nest without a special permit. Even if it were legal, geese are very unlikely to continue to incubate their eggs if they are relocated.
    • Signage
      You may want to erect barricades and signs to keep traffic and pedestrians away from the nest area.
    • Escort
      Soon after the eggs have all hatched, the parent geese will attempt to lead their goslings from the nest site to whatever body of water they’ve decided upon as a destination. The local police and/or lot security may be able to give the goose family an escort across the parking lot to a safe place. The escort can help keep the geese safe during their passage and will likely also help keep motorists safer, as well. The escorts may need to slowly and quietly guide the goose family around obstacles and hazards on their trip.

    Your local, licensed wildlife rehabilitator may also be able to help. In Milwaukee County, you are welcome to call us at (414) 431-6204.

  • Wildlife in My Yard or Garden

    Wildlife in My Yard or Garden

    Gardens are full of delicious food for all types of wildlife. When animals “raid” a vegetable garden or dig up a flower bulb, they don’t know they are “trespassing” or “stealing,” and they are not deliberately doing this to frustrate you or try to drive you crazy. Similarly, lawns can be full of tasty grubs or worms, turning your green space into an excavation zone for animals digging for a tasty treat. While it can be frustrating for us humans, try to remember that they are simply utilizing the resources in their environment in order to survive. 


    FAQs and Humane Solutions:

    “Animals are getting into my garden and eating my plants and flowers. What can I do to stop them?”

    • Tolerance 
      Any time wildlife and people share living space, there are going to be conflicts over resources to varying degrees. It is unrealistic to expect that wildlife must never have any effect on your garden and landscaping. So, if the damage caused by animals is occasional and slight — a nibble here and there — you may not need to do anything. That being said, the best time to take action to suppress or even stop more serious landscape damage is when it first appears. It is easier to stop further damage when the animals are in an exploratory stage. For example, you just noticed that deer are beginning to browse on your shrubs in early winter, or spring seedlings are just coming up in your vegetable garden, and you’ve noticed the tender new plants are being nibbled on.
    • Scare Tactics
      It is often possible to temporarily frighten animals away from plants you are trying to protect, especially when there is other “natural” food available for the animals, and they haven’t already gotten into the habit of dining on the plants you’re trying to protect.
      Animals can quickly become accustomed to some scare tactics, especially if the scare tactics are continuous or if the “scary” tactic doesn’t move or change positions over time. For example, the plastic owls and fake snakes sold for this purpose may work for a day or two, but when the animals get the idea that these figures don’t move at all, they’ll no longer be frightened by them. See the PDF linked at the top of this page for photos and examples of some scare tactics that can be effective. We recommend and sell both the ScareCrow, a motion-activated sprayer, and Irri-tape, an iridescent Mylar ribbon.
    • Repellents
      Repellants can be effective in reducing damage when they are sprayed on individual plants or small groups of plants, especially when there is other food available to animals and they have not already established a habit of feeding on the plants you are trying to protect. Repellents are NOT effective at keeping animals away from an entire garden or out of your yard. 
    • Fencing
      For many species, the most effective, long-term solution is to install fencing around your garden. Some gardeners make fencing panel frames using 2” x 2” lumber and staple chicken wire or other similar fencing to the outside of these panels. With vertical stakes for support, the panels are wired or cable-tied together end-to-end to make a fence. These panels can be put up when they are needed, such as in the early spring, and taken down and stacked out of the way when they are not needed

      Rabbits
       – A two-foot-high fence will keep rabbits out. Use chicken-wire or fencing with 1” x 1” or 1” x 2” or smaller mesh. Planting in raised garden beds can also effectively exclude rabbits (see photos in the PDF linked at the top of the page). Make sure that fencing is installed tightly to the ground to prevent rabbits from slipping under the fence.

      Woodchucks – The fence should be 4 feet high and buried 12 or more inches below ground. Use mesh that is no larger than 3” x 3” (using mesh that is smaller than this will help keep rabbits out, too). Woodchucks are great diggers, so ideally, the bottom of the fence will be bent or joined with another piece of fencing at 90-degrees outward in an “L”. The bottom of the “L” should be 12 to 24 inches wide. This will discourage animals from digging under the fence. See the diagram in the PDF linked at the top of the page. Woodchucks are good climbers, so you may need to flare the top 1 or 2 feet of the fence outward at a 45-degree angle to prevent them from going over the fence. Or, instead of flaring the fence outward as described, reportedly, leaving the top 1 or two feet of the fence unsupported by fence posts will make a woodchuck feel insecure about climbing on this “floppy” portion of the fence.

      Squirrels and Chipmunks – These nimble animals are excellent climbers, so fencing is very unlikely to provide much of a deterrent.

      Deer – A four-foot high fence around small garden plots can discourage deer from casually browsing on garden plants when other “natural” foods are available to the deer. For larger plots and for times when natural food is not abundant (i.e. winter and early spring) the fence will need to be at least six feet high. When natural foods are very scarce, deer have been known to leap over eight-foot high fences to get to food!

    “Are there any types of plants that deer, rabbits, and woodchucks do not like?”

    No plant should be considered to be 100% deer- or rabbit-proof. However, there are a number of plants that have track records of being deer- and/or rabbit-resistant under most conditions. We suggest that you check with a local, experienced horticulturalist, Master Gardener, or experienced garden center staff for a list of plants (ideally native Wisconsin plants) they recommend for your area. 

    “I just laid some sod, and animals are pulling the sod back at night! Why are they doing this, and how can I stop them?”

    Raccoons or skunks are pulling the sod up to get to the tasty grubs and worms that like to live under the watered sod. The animals typically stop this behavior once you stop watering. But to get them to stop this behavior, you can try not watering the sod at night, when these animals are active, and instead set up a ScareCrow motion-detector sprayer to frighten the animals away with a blast of high-pressure water. Other methods to try are to sprinkle Critter Ridder® granules around the new sod, but outside of the area you are watering (water will wash away the repellent). Another good method is to temporarily cover the sodded area with overlapping strips of chicken-wire mesh. The perimeter and overlapping areas of the mesh should be held down with bricks or rocks, or staked down with landscape staples.

    “How can I keep skunks and raccoons from digging holes in my lawn?”

    Skunks and raccoons may dig small divots in your lawn when they forage for grubs and worms. The grubs can kill your grass/sod by eating the roots of the grass, so the skunks or raccoons are actually doing you a favor by consuming these pests. Just repair the divots by tamping them down with your foot.

    But if you really can’t tolerate the after-effect of the animals’ foraging activities, a short-term solution to keep the raccoons and skunks away is to use The ScareCrow, a motion sensor sprayer. The ScareCrow will give an animal a harmless, but frightening, blast of water when they walk into the sprayer’s motion-sensor field. Or, you could try sprinkling Critter Ridder pepper-based non-toxic repellent around or on small areas to temporarily keep the animals away.

    A longer-term solution would be to treat your lawn for grubs. “Beneficial nematodes” are organisms that can be purchased at a garden store or over the Internet. Once introduced to your lawn, over time, the nematodes can control the grubs, thus removing the incentive for skunks and raccoons to dig in your lawn. We recommend that you consult with an experienced Master Gardener or horticulturist in your area for information about treating your lawn for grubs.

  • Wildlife in My Garbage Can or Dumpsters

    Wildlife in My Garbage Can or Dumpsters

    The animals are attracted to the smell of food and enter unsecured trash receptacles in the hope of finding something to eat. Sometimes, gnawing animals like squirrels will chew their way into plastic trash cans or carts to find the veritable buffet inside. Climbing animals like raccoons may use nearby objects like walls, poles, or trees to gain access to dumpsters, but then may not be able to get out. 


    FAQs & Humane Solutions:

    “Raccoons keep getting into the dumpster in our alley at night. How can I keep them out?”

    Avoid problems with wild animals going into dumpsters by keeping the lids closed, especially at night. Be sure to also keep the dumpster at least three feet away from fences, brick walls, trees, and utility poles that animals could climb to get into the dumpster. 

    “Animals keep getting into our trash cans and making a mess. How can I keep them out?”

    You can help avoid problems with animals getting into your trash cans or carts by keeping them in the garage until your trash collection day. If keeping the trash receptacles in the garage isn’t possible, an alternative would be to secure lids with bungee cords. These inexpensive, stretchable bands of rubber or elastic with a hook on each end are available at hardware stores and home centers.

    “Squirrels have gnawed through the lid of our plastic trash cart and they go in there looking for food. Is there anything I can do to stop that?”

    You can discourage squirrels from going into the cart after your trash by double-bagging your trash in securely-tied, plastic trash bags to suppress the scent of any food items inside. You could also try using a scent that squirrels don’t like on top of your trash inside the cart, such as peppermint oil or household ammonia applied to a paper towel or old cloth. 

    “An opossum climbed into our trash cart last night, but I don’t think it can get out. What should we do?”

    If you gently tip the container over on its side with the lid open and then leave the area, the animal will leave on its own. However, it may not wish to leave during the daytime, especially if there is human activity in the area. If there is a lot of vehicle traffic close by or there are children in the area, keep them away and wait until after dusk to lay the cart or can on its side. Do not offer the opossum any food or water.

    “A raccoon climbed into a dumpster, but there isn’t much trash and I don’t think it can climb out. What should we do?”

    Place a ladder, sturdy branch, or board for the animal to climb on in the dumpster at a shallow angle leading up to the top of the container. The dumpster lid should be left open to allow the animal to exit. It is important to know that raccoons are generally only active at night, so they may not leave until after dark. Keep activity to a minimum in the area around the dumpster so the animal will not be too frightened to leave. Do not offer the raccoon any food or water. If the dumpster is scheduled for emptying or pickup that same day, and you are in Milwaukee County, please call us at (414) 431-6204. We may be able to help.

  • Wildlife in My Garage or Shed

    Wildlife in My Garage or Shed

    An animal will sometimes wander into a garage or shed looking for food or shelter if the door is left open.
    They can gain entry through holes in the structure’s walls, roof, or foundation that are caused by water-damage or missing boards, siding, or shingles, or broken windows.
    Birds like American Robins or Barn Swallows, looking for a safe place to nest, sometimes will go into a garage or shed through an open door or a broken window. 


    FAQs & Humane Solutions:

    “I forgot to close my garage door last night and now I have an opossum (or raccoon, or skunk, etc.) inside the garage. What should I do?”

    If you leave the garage door open for a few hours, the animal will usually leave on its own. However, for a nocturnal (night-active) animal like an opossum, raccoon, or skunk, the animal will probably not leave until after dark. If you can’t leave your garage door wide open for security reasons, you may try lowering the garage door to within about 4 to 6 inches of the pavement. Then disable the garage door opener or block the door track so someone can’t raise the door from the outside. This should allow the animal enough room under the door to get out. If the animal has not left after a day or two, hazing methods could be used to coax the animal out (tips below).

    “A chipmunk (or other rodent) keeps chewing their way into my garage by gnawing on the garage doors. What can I do to keep them out?”

    • Keep any food stored in the garage, like bird seed or grass seed, in metal containers to keep rodents from getting to it, and clean up any spilled seed right away.
    • Spray a liquid, non-toxic taste-repellent like “bitter apple” on the edge of the door and any other surface you don’t want the animal(s) to chew on. Bitter apple spray is available at WHS and most pet supply stores.
    • Instead of applying a repellent, you can use staples, or short screws and fender washers to attach sheet-metal edging or hardware cloth on door edges and door frames to stop animals from chewing.
    • Consider installing a rodent-proof garage door sweep. These sturdy sweeps have a metal backer that prevents rodents from chewing through the otherwise flimsy rubber. 

    “I’ve got a raccoon (or opossum, or squirrel, etc.) living in my shed (or garage). I haven’t left the door open at all, so they must be getting in some other way. How do I get them to leave?”

    Note: the techniques below do not apply to situations involving bats.

    You can do what we call “hazing” to get the animal to leave. Hazing involves temporarily converting that dark, safe, quiet wildlife haven inside your garage or shed into a bright, noisy, smelly area in which the animal no longer feels comfortable or safe.

    The supplies that will be needed are: a bright light, such as a mechanic’s trouble light or a floodlight, a portable radio, and some type of non-toxic animal repellent such as Critter Ridder® or Expel®, or rags drenched in household ammonia.

    • Securely set up the light inside the structure about five feet away from the entrance hole and turn it on, shining toward the entrance hole. Caution: Keep power cords away from the entrance itself, or the animal may gnaw on the cord. Keep the light itself away from flammable materials. 
    • Place the radio in the garage or shed, preferably close to the animal’s “den” or about five feet away from the entrance hole. Tune the radio to a talk station or a rock-and-roll station and have it on a moderately-loud volume (not loud enough to anger your neighbors or keep your family from getting to sleep at night).
    • Place rags drenched in household ammonia or the animal repellent in the animal’s entrance hole, or sprinkle the Critter Ridder there instead.
    • The animal might leave the first night you do this, but you’ll probably need to keep this up for three days in a row, or perhaps longer. You can turn the radio off or turn the volume down periodically if the noise gets to be too much for you or your neighbors. The ammonia on the rags will evaporate, so you may need to re-wet them with fresh ammonia once or twice a day.

    “Once I have done the hazing, how do I know if the animal is gone?”

    To determine if the animal is gone, loosely crumple newspaper into a ball and place it in the animal’s entry hole into the garage or shed. If the newspaper is not disturbed after three days, the animal MAY have moved out. However, this method is only reliable if there is no other place that the animal can get into the garage or shed. 

    Caution: be very careful using this technique to detect animal activity during the late fall, winter, and early spring. Some animals hibernate, and others greatly reduce their activity and “hole up” in a safe, relatively warm place for days or even weeks at a time when it is very cold. Do not do permanent repairs or install an animal-proof barrier (more about this below) until you are SURE that no animals will be trapped inside.

    Another option for checking to see if the animal has left is a trail camera. These weather-resistant digital cameras automatically take a photo or video clip when something passes in front of the camera. These cameras are sold at sporting goods stores and online. The camera should be placed so that it will be triggered by an animal going in or out of the opening in the structure.

    “Once the animal has left, how can I prevent it or another animal from getting back inside?”

    You are right, once this animal leaves and the hazing stops, you are very likely to have another animal move in if you don’t “animal-proof” the area. By “animal-proofing,” we mean installing a barrier that animals cannot chew through, pull apart, dig under, or climb over. Welded wire mesh or hardware cloth are usually good choices for this, since they are strong, long-lasting, easy to work with, are relatively inexpensive, and, except for welded wire mesh, are readily available at most hardware stores and home improvement centers. Welded wire mesh can be a little more challenging to find, but it is available from some farm-and-ranch supply stores, fencing retailers, and online. If you are shopping for welded wire mesh, look for 1” x 1” galvanized mesh made with 16-gauge wire. 

    Materials you will need:

    • Galvanized hardware cloth or welded wire mesh
    • Screws – we like 1 ¼” galvanized pan-head lath screws, but drywall screws should also work
    • Fender washers – we like 1” diameter washers with a 3/16” hole

    Tools you will need:

    • Safety glasses
    • Leather gloves – to protect your hands from possibly sharp metal edges
    • Cordless or corded drill/screwdriver with an appropriate bit for driving the screws you will be using
    • Wire cutter, or sheet metal cutting shears (the latter works well for hardware cloth) 
    • Optional – for large jobs, you may want to rent an electric sheet-metal and wire-mesh cutting shears. Or for cutting welded wire mesh, use an electric reciprocating saw with a metal-cutting blade to speed up the mesh-cutting process. 

    Instructions:

    1. Cut the mesh to fit. Measure the width and length of the piece(s) of mesh you’ll need. Make the piece of mesh a few inches in each direction larger than the hole. Cut the piece and fit it into place. Trim and/or bend the piece as needed until it fits properly.
    2. Install the wire mesh. Use the drill/driver to install the mesh to the structure over the hole using the lath screws and fender washers. To do this, hold the mesh in place and drive the screw through a washer to anchor the mesh to the structure. Use as many screws and washers as are needed to securely hold the mesh in place.
    3. Animal-proof other possible entry points. With the entry hole covered, animals may look for other weak points on your structure that they can use to get inside. These weak points are often areas of water-damaged or rotted wood, loose trim boards or siding, and flimsy or missing vent covers. Proactively install wire mesh over these areas to keep animals from gnawing through or tearing open these weakened spots. Pay careful attention to corners – anywhere that two walls or panels meet — such as under overhangs, outside corners of the fascia, where gables meet the roofline, etc.
    4. After you’ve repaired and animal-proofed your garage or shed, check back at least twice a day for the next three days to make sure that no animals have accidentally been closed inside and are unable to get out. If an animal appears to be desperately and persistently trying to get back in the structure, they may be a mother animal with babies still inside. In this case, temporarily remove the mesh you installed over the entrance hole. Not being able to get to her babies for a short time because of the animal-proofing you’ve installed is usually enough to get a mom animal to move her young elsewhere. Resume the hazing techniques and give her another day or two to move her family out.

    “A bird flew into my garage and can’t seem to find its way out. What should I do?”

    Open any windows, or if the windows don’t open, cover them with a blanket, sheet, towel, cardboard, or thick paper so the bird doesn’t mistake the window for an exit and collide with the glass. Then turn off the garage lights and open the garage door. The only light left will be coming from the outside through the garage door. Keep people, pets, and noisy activities away from the garage door so the bird will not be too afraid to fly out. Given some time, a bird will usually fly toward the light and out the open door.

    However, for most birds, “up” means safety, so if the bird stays up high in the rafters and doesn’t seem to want to come down to fly out the door, tie or tape a brightly-colored or white cloth or piece of paper on a long stick to make a “flag.” Reach up with the flag on the long stick above the bird to get the bird to fly downward away from the flag. Once the bird comes down out of the rafters, it will usually see the open door and fly out.

    For seed-eating birds like sparrows, cardinals, doves, and pigeons, you can place a small pile of bird seed on the floor just inside or just outside the open door. Often, if left alone, the bird will fly down to the seed and then fly out of the door.

    “A bird flew into my garage/shed and started to build a nest. What should I do?”

    If the bird has just started carrying in material for a nest but hasn’t yet laid eggs, you can wait for the bird to leave to get more nest material or find food, and then close the garage door. The birds will find another place to nest and start over. You’ll need to keep your garage door closed during the day for the rest of the nesting season to keep birds out.

    If you are not worried about leaving your door open at night, you can let the birds nest there and close the door after their young have left the nest.

    If there are eggs or young in the nest, the birds and their nests and eggs are protected by state and/federal laws, and you can’t legally disturb them (unless they are House Sparrows, European Starlings, or Rock Pigeons). If you are in Milwaukee County, you are welcome to call us for further advice at 414-431-6204. If you are outside of Milwaukee County, please call your local, licensed wildlife rehabilitator for advice.

    “I am unable to humanely haze the animal out of my garage/shed or make repairs to prevent animals from re-entering. Will you do it for me?”

    We function as a non-profit wildlife hospital and do not have the resources to provide those services. There is the option, however, to hire a humane animal removal company to do the work for you. For more information on choosing the right company for the job, click here.

  • Deer Solutions

    Deer Solutions

    Around Your Property

    The expansion of suburbs and the resulting landscape changes have created an ideal habitat for deer. Mild winters, abundant food sources, and a lack of natural predators have also contributed to the growth in the suburban deer population. Consequently, the chance of conflicts with humans increases as the number of deer increases. Fortunately, most deer damage can be successfully abated with simple, humane techniques.

    Fencing
    Fencing landscape plants and crops is the most effective way to eliminate deer browsing. Fences should be at least six feet high, and openings should be no more than four inches wide. Fencing should be combined with chemical repellents and other deterrents for the first year.

    Individual trees, bushes, and groundcover can be protected with stiff plastic netting. Netting is most effective when used for short periods during critical times; it reduces rather than eliminates browsing.

    Scare Devices
    Visual deterrents such as strobe lights, timed lighting systems, or Mylar tape strung between trees may startle deer. Loud distress calls of other animals, commercial ultrasonic devices, motion-activated sprinklers, tin can rattles, and other noise deterrents can help scare deer away from your yard. However, deer may become habituated to these hazing techniques. To maintain their effectiveness, move them frequently or combine them with other approaches such as fencing and chemical repellents.

    Chemical Repellents
    A variety of commercial and home-made repellents have proven successful in deterring deer. Repellents work either by making plants unpalatable or by giving off an offensive odor. They are most effective if used when signs of deer first appear and not after significant damage has occurred. Deer repellents are available at nurseries and hardware stores.

    Homemade Deer-Away:
    Blend 4 eggs, 2 ounces of red pepper sauce, and 2 ounces chopped garlic with enough water to make 1 quart. Strain and apply liquid with a garden sprayer. Makes enough for one application on 16 bushes.

    Landscape Changes

    The selection and placement of plants has a significant impact on the extent of damage. Some plants attract deer, while others may repel them.

    Repellent plants – Catnip, Chives, Garlic, Honeybush, Lavender, Onion, Sage, Spearmint, Thyme, and Yarrow.

    Resistant trees and shrubs – Bottle brush, Douglas fir, Holly, Jasmine, Juniper, Maple, Oleander, Rhododendron, Wild Lilac, and Blue Spruce

    Resistant flowers and groundcover – Allium, Black-eyed Susan, Chrysanthemum, Daffodil, Hyacinth, Iris, Oriental poppy, and Zinnia

    Property borders and entryways can be made less attractive by lining them with resistant and repellent plants. Also, grass and underbrush should be kept trimmed, and ripe fruits removed promptly.

    Watch for Deer

    With the increase in deer population comes an increased risk of deer-vehicle collisions. Accidents are dangerous and can be fatal for both people and deer. Here are a few tips to avoid hitting a deer:

    • Always watch for wildlife, especially at dawn, dusk, and the first few hours of darkness. Be extra cautious in late spring and mid-to late fall.
    • Glance continuously from the road to the roadside, looking for movement where roads are bordered by fields or natural habitat. Heed warning signs and reduce speed in places deer are most likely to cross. If you see one deer cross, expect others. If a deer “freezes” in your headlights, try turning your lights off and then back on.

    Please Don’t Feed the Deer

    Feeding by humans only serves to encourage deer to remain in an area, and it reduces their fear of people. Moreover, under certain conditions, artificial winter feeding can boost the birth rates the following spring.

    More information about humanely co-existing with our wild neighbors can be obtained by browsing our other expert articles.


    Modified and shared with permission of the Animal Protection Institute.

  • Wildlife Under My Porch or Deck

    Wildlife Under My Porch or Deck

    Wild animals survive by constantly searching for and utilizing the resources they find in their environment. They interpret the gap under your deck or the missing board under your porch as a “Welcome” sign. They are not aware that they are trespassing; they only know that there is an entry hole that lets them get into a relatively warm, dark, safe and quiet place. For animals like opossums, raccoons, foxes, skunks, and woodchucks a porch or deck forms a ready-made roof under which they feel more secure from danger and protected from the elements. Raccoons and opossums usually like to just curl up as far back from the edge as they can get. Skunks, woodchucks and foxes may dig a burrow in the soil under the deck or porch. 


    FAQs and Humane Solutions

     “Will you come remove an animal from under my deck, or can I rent a live-trap from you so I can trap it myself?”

    The answer to both questions is “no,” because we have a much better solution to offer. The self-help techniques described below are much more humane than trapping and relocating an animal, provide a more ecologically-sound solution than relocation, and are more likely to provide you with a lasting solution at less expense than removal/relocation. For more information about our position on relocating wild animals, please click here. 

    “There is a family of animals living under our deck and don’t mind them being there. But are they dangerous? Should we be concerned?”

    We have counseled with hundreds of thousands of people over the last three decades who have called us for answers to their questions about backyard wildlife. In all that time, never once did we have someone tell us that a fox, raccoon, opossum, skunk, or woodchuck had bitten them or a family member, even when the animal had babies. So, in our experience, the risk to human safety from an animal living under a deck or porch is very small. That being said, you should be careful to never corner them or try to get too close, especially their young. And you absolutely, positively, should not feed them. Providing food will get them to associate humans with food, and we DO frequently get calls from people who have wild animals in their neighborhood who are seemingly unafraid of humans, and some that have even become bold in approaching people. This is usually caused by people putting food out for wild mammals, and this is not a good situation for the animal or for people.

    So we suggest tolerance first. If you later find that you need to get the animal(s) to move elsewhere, you can use the advice we provide below. 

    “There is an animal living under my deck. How can I get them to leave?”

    If you can’t tolerate the animal(s) living there, we recommend that you use a combination of concurrent “hazing” and exclusion. 

    1. Hazing involves temporarily converting that dark, safe, quiet wildlife haven under your deck or porch into a bright, noisy, smelly area in which the animal no longer feels comfortable or safe. The supplies that will be needed are: a bright light, such as a mechanic’s trouble light or a floodlight, a portable radio, and some type of non-toxic animal repellent such as Critter Ridder®, Expel®, or rags drenched in household ammonia. 

      Hazing Technique – Set up the light under the deck or porch, ideally about five feet away from the entrance hole, and turn it on, shining it toward the animal’s sleeping area or the entrance to its burrow. Caution: Keep power cords away from the entrance itself, or the animal may gnaw on the cord. Make sure the light cannot tip over and that it is not hot enough or close enough to anything flammable that it could start a fire. If possible, place the radio within several feet of the animal’s “den” or about five feet away from the entrance hole. Tune the radio to a talk station or a rock-and-roll station and have it on with the volume turned up as loud as you reasonably can. If possible, place rags drenched in household ammonia or apply the non-toxic repellent just under the edge of the deck at the point where the animal comes and goes (look for an area where the grass or soil is flattened or worn away) from the deck or porch. Do NOT put ammonia, repellent, or any other product into the actual burrow or den of an animal! Any baby animals inside would be unable to escape the odors or could be harmed by direct contact with the substance. Shine the light and play the radio starting every day in the evening and going all night. The animal might leave the first night you do this, but you’ll probably need to keep this up for a few nights or perhaps longer. The ammonia on the rags will evaporate, so you’ll need to re-wet them with fresh ammonia once or twice a day. 
      Note: hazing works best in relatively small areas. In a very large area, such as under a large deck, the animal may simply avoid the hazing techniques by moving its activity away from the hazing to another area under the deck. In this case, you’ll need to introduce enough light and noise to make the entire area undesirable. 
    2. Exclusion – Installing an animal-proof barrier around the porch or deck at the same time you are doing the hazing may help encourage the animal to relocate on its own, but will also prevent this animal, or other animals, from setting up housekeeping there in the future. If you don’t “animal-proof” the area, you are very likely to have another animal eventually move in. By “animal-proofing,” we mean installing a barrier that animals cannot chew through, pull apart, dig under, or climb over. Welded wire mesh or hardware cloth are usually good choices for this, since they are strong, long-lasting, easy to work with, are relatively inexpensive, and, except for welded wire mesh, are readily available at most hardware stores and home improvement centers. Welded wire mesh can be a little more challenging to find, but it is available from some farm and ranch supply stores, fencing retailers, and online. If you are shopping for welded wire mesh, look for 1” x 1” or 1” x ½” galvanized mesh made with 14.5 or 16-gauge wire.

      See the downloadable PDF linked at the top of this page for helpful photos and step-by-step instructions.

      Materials you will need:
      • Galvanized hardware cloth or welded wire mesh
      • Screws – we like 1 ¼” galvanized pan-head lath screws, but deck screws should also work
      • Fender washers – we like 1” diameter washers with a 3/16” hole

      Tools you will need:
      • Safety glasses
      • Leather gloves – to protect your hands from possibly sharp metal edges
      • Cordless drill/screwdriver with appropriate bit for driving the screws you will be using
      • Wire cutter, or sheet metal cutting shears (the latter works well for hardware cloth)
      • Long-handle or short-handle round-point shovel
      • Grub hoe or pick-mattock – optional for trenching in hard or rocky soil
      • Tape measure
      • Optional – for large jobs, you may want to rent an electric sheet-metal and wire-mesh cutting shears. Or, if you are working with welded-wire mesh, use an electric reciprocating saw with a metal-cutting blade to speed up the mesh-cutting process. 

      Instructions:
      1. Trenching – To keep animals from digging under the barrier you are installing, you’ll need to either dig an approximately 12” deep (or deeper) by 4-6” wide trench around your porch, deck, or shed and bury the lower portion of the wire mesh, or you’ll need to extend an “L”-shaped apron of wire mesh on the surface of the ground 12”- 18” out from the edge of the deck. If you choose the latter, you’ll need to place heavy bricks or rocks on top of the mesh or use landscape staples to hold it down. You can cover the surface mesh with a layer of soil, gravel, or mulch.
      For maximum effectiveness, combine the two methods by burying “L”- shaped mesh in a trench 12 inches underground and 12 inches out from the edge of the shed. 
      WARNING: Before trenching, check with your local utility provider to make sure it is safe for you to dig without hitting utility cables or pipes. In Wisconsin, call Digger’s Hotline at (800) 242-8511; or online at www.diggershotline.com

      2. Install mesh – Measure and cut pieces of mesh for your application. Bend and shape the mesh as needed to form an “L” to go around corners, to fit around obstacles, etc.
      Use the drill/driver, lath screws, and fender washers to attach the mesh to the lower edge of the deck or porch every 6 to 12 inches. When attaching mesh to concrete, such as where the deck meets the foundation of a structure, leave a few inches of extra mesh on that end. Bend the mesh into an “L” where it meets the wall, and use a masonry drill-bit and anchors made for using screws in concrete to attach the “L”-shaped “tab” on the end of the piece of mesh to the concrete. If you are using multiple pieces of mesh, be sure to overlap them by a couple of inches so that animals can’t get through any gaps between pieces of mesh. 
      IMPORTANT: At this point, do not completely mesh in the entire perimeter of the deck! Look for the place that the animal comes and goes from under the porch or deck. This spot usually has worn-down soil, grass, or other vegetation from the animal’s coming and going. Leave an opening in the mesh large enough for the animal to come and go from under the deck or porch. You will not close this opening until you are absolutely sure that no animals are still under the deck. If you choose to install a one-way door, this entry point is the best area to use it. 

      3. Begin Hazing – (see above for method). Continue for two or three nights, then test to see if the animal(s) have moved out (see next step).

      4. Newspaper Test – Loosely crumple several sheets of newspaper into a ball and stuff the ball into the opening you’ve left in the mesh around your deck. Then check the paper daily for the next three days to see if it has been removed from the hole. If the ball of paper has been removed, it means the animal is still using that entrance/exit. You’ll then need to continue the hazing techniques for a couple of more days and then try the newspaper test again. Repeat until you are satisfied that no animals remain under the deck or porch. Another way to check to see if the animal has left is a “trail camera.” These highly weather-resistant digital cameras automatically take a photo(s) or a clip of digital video when something passes in front of the camera. These cameras are sold at sporting goods stores and online. The camera should be placed so that it will be triggered by an animal going in or out of the opening under the structure. 

      5. Closure – once you are sure that no animals remain under the deck, securely close the opening you had left in the mesh.

      6. Monitoring – After you’ve repaired and animal-proofed your deck or porch, check back at least twice a day for at least the next three days to make sure that no animals have accidentally been closed inside and are unable to get out.

    A Note About One-way Doors 
    A one-way door (available online) is a device that lets an animal get out from under the deck or porch but not get back in through that door. A one-way door must NOT be used unless you are absolutely positive that there are no baby animals under the deck or porch. One-way doors are species-specific and must be installed correctly for maximum effectiveness. If you are unsure about the species living under your deck or shed, do not use a one-way door.

    A one-way door would be installed in the opening you’ve left in the mesh. A smear of peanut butter is placed on the inside surface of the door to attract the animal’s attention and help it discover that the door pushes open easily. Once the animal goes out the door, it will not be able to get back in. When you are SURE that all animals have exited the door, you can remove the door and close the opening in the mesh. 

    With a one-way door installed, if you see an animal desperately and persistently trying to get back into the excluded area, it may have babies inside. In this case, prop the one-way door open for 1-2 days or remove it entirely and resume hazing. This will give the mom an opportunity to move her young to a new location.

    *Caution: be very careful using a one-way door or the Newspaper Test to try to detect animal activity during the late fall, winter, and early spring. Some animals hibernate, and others greatly reduce their activity and “hole up” in a safe, relatively warm place for days or even weeks at a time when it is very cold or when there is deep snow. Do not do permanent repairs or install an animal-proof barrier until you are SURE that no animals will be trapped inside.

    “I don’t really want to go to all of the trouble of installing the exclusion mesh. Can’t I just do the hazing techniques to get the animal to leave?”

    Yes, you could try just doing the hazing without the exclusion. However, sooner or later, you are likely to have another animal, or maybe even the same animal, move in after you stop the hazing. There is always the option to hire a humane animal removal company to do the work for you. For more information on choosing the right company for the job, click here