• Deer Solutions

    Deer Solutions

    Around Your Property

    The expansion of suburbs and the resulting landscape changes have created an ideal habitat for deer. Mild winters, abundant food sources, and a lack of natural predators have also contributed to the growth in the suburban deer population. Consequently, the chance of conflicts with humans increases as the number of deer increases. Fortunately, most deer damage can be successfully abated with simple, humane techniques.

    Fencing
    Fencing landscape plants and crops is the most effective way to eliminate deer browsing. Fences should be at least six feet high, and openings should be no more than four inches wide. Fencing should be combined with chemical repellents and other deterrents for the first year.

    Individual trees, bushes, and groundcover can be protected with stiff plastic netting. Netting is most effective when used for short periods during critical times; it reduces rather than eliminates browsing.

    Scare Devices
    Visual deterrents such as strobe lights, timed lighting systems, or Mylar tape strung between trees may startle deer. Loud distress calls of other animals, commercial ultrasonic devices, motion-activated sprinklers, tin can rattles, and other noise deterrents can help scare deer away from your yard. However, deer may become habituated to these hazing techniques. To maintain their effectiveness, move them frequently or combine them with other approaches such as fencing and chemical repellents.

    Chemical Repellents
    A variety of commercial and home-made repellents have proven successful in deterring deer. Repellents work either by making plants unpalatable or by giving off an offensive odor. They are most effective if used when signs of deer first appear and not after significant damage has occurred. Deer repellents are available at nurseries and hardware stores.

    Homemade Deer-Away:
    Blend 4 eggs, 2 ounces of red pepper sauce, and 2 ounces chopped garlic with enough water to make 1 quart. Strain and apply liquid with a garden sprayer. Makes enough for one application on 16 bushes.

    Landscape Changes

    The selection and placement of plants has a significant impact on the extent of damage. Some plants attract deer, while others may repel them.

    Repellent plants – Catnip, Chives, Garlic, Honeybush, Lavender, Onion, Sage, Spearmint, Thyme, and Yarrow.

    Resistant trees and shrubs – Bottle brush, Douglas fir, Holly, Jasmine, Juniper, Maple, Oleander, Rhododendron, Wild Lilac, and Blue Spruce

    Resistant flowers and groundcover – Allium, Black-eyed Susan, Chrysanthemum, Daffodil, Hyacinth, Iris, Oriental poppy, and Zinnia

    Property borders and entryways can be made less attractive by lining them with resistant and repellent plants. Also, grass and underbrush should be kept trimmed, and ripe fruits removed promptly.

    Watch for Deer

    With the increase in deer population comes an increased risk of deer-vehicle collisions. Accidents are dangerous and can be fatal for both people and deer. Here are a few tips to avoid hitting a deer:

    • Always watch for wildlife, especially at dawn, dusk, and the first few hours of darkness. Be extra cautious in late spring and mid-to late fall.
    • Glance continuously from the road to the roadside, looking for movement where roads are bordered by fields or natural habitat. Heed warning signs and reduce speed in places deer are most likely to cross. If you see one deer cross, expect others. If a deer “freezes” in your headlights, try turning your lights off and then back on.

    Please Don’t Feed the Deer

    Feeding by humans only serves to encourage deer to remain in an area, and it reduces their fear of people. Moreover, under certain conditions, artificial winter feeding can boost the birth rates the following spring.

    More information about humanely co-existing with our wild neighbors can be obtained by browsing our other expert articles.


    Modified and shared with permission of the Animal Protection Institute.

  • Wildlife Under My Porch or Deck

    Wildlife Under My Porch or Deck

    Wild animals survive by constantly searching for and utilizing the resources they find in their environment. They interpret the gap under your deck or the missing board under your porch as a “Welcome” sign. They are not aware that they are trespassing; they only know that there is an entry hole that lets them get into a relatively warm, dark, safe and quiet place. For animals like opossums, raccoons, foxes, skunks, and woodchucks a porch or deck forms a ready-made roof under which they feel more secure from danger and protected from the elements. Raccoons and opossums usually like to just curl up as far back from the edge as they can get. Skunks, woodchucks and foxes may dig a burrow in the soil under the deck or porch. 


    FAQs and Humane Solutions

     “Will you come remove an animal from under my deck, or can I rent a live-trap from you so I can trap it myself?”

    The answer to both questions is “no,” because we have a much better solution to offer. The self-help techniques described below are much more humane than trapping and relocating an animal, provide a more ecologically-sound solution than relocation, and are more likely to provide you with a lasting solution at less expense than removal/relocation. For more information about our position on relocating wild animals, please click here. 

    “There is a family of animals living under our deck and don’t mind them being there. But are they dangerous? Should we be concerned?”

    We have counseled with hundreds of thousands of people over the last three decades who have called us for answers to their questions about backyard wildlife. In all that time, never once did we have someone tell us that a fox, raccoon, opossum, skunk, or woodchuck had bitten them or a family member, even when the animal had babies. So, in our experience, the risk to human safety from an animal living under a deck or porch is very small. That being said, you should be careful to never corner them or try to get too close, especially their young. And you absolutely, positively, should not feed them. Providing food will get them to associate humans with food, and we DO frequently get calls from people who have wild animals in their neighborhood who are seemingly unafraid of humans, and some that have even become bold in approaching people. This is usually caused by people putting food out for wild mammals, and this is not a good situation for the animal or for people.

    So we suggest tolerance first. If you later find that you need to get the animal(s) to move elsewhere, you can use the advice we provide below. 

    “There is an animal living under my deck. How can I get them to leave?”

    If you can’t tolerate the animal(s) living there, we recommend that you use a combination of concurrent “hazing” and exclusion. 

    1. Hazing involves temporarily converting that dark, safe, quiet wildlife haven under your deck or porch into a bright, noisy, smelly area in which the animal no longer feels comfortable or safe. The supplies that will be needed are: a bright light, such as a mechanic’s trouble light or a floodlight, a portable radio, and some type of non-toxic animal repellent such as Critter Ridder®, Expel®, or rags drenched in household ammonia. 

      Hazing Technique – Set up the light under the deck or porch, ideally about five feet away from the entrance hole, and turn it on, shining it toward the animal’s sleeping area or the entrance to its burrow. Caution: Keep power cords away from the entrance itself, or the animal may gnaw on the cord. Make sure the light cannot tip over and that it is not hot enough or close enough to anything flammable that it could start a fire. If possible, place the radio within several feet of the animal’s “den” or about five feet away from the entrance hole. Tune the radio to a talk station or a rock-and-roll station and have it on with the volume turned up as loud as you reasonably can. If possible, place rags drenched in household ammonia or apply the non-toxic repellent just under the edge of the deck at the point where the animal comes and goes (look for an area where the grass or soil is flattened or worn away) from the deck or porch. Do NOT put ammonia, repellent, or any other product into the actual burrow or den of an animal! Any baby animals inside would be unable to escape the odors or could be harmed by direct contact with the substance. Shine the light and play the radio starting every day in the evening and going all night. The animal might leave the first night you do this, but you’ll probably need to keep this up for a few nights or perhaps longer. The ammonia on the rags will evaporate, so you’ll need to re-wet them with fresh ammonia once or twice a day. 
      Note: hazing works best in relatively small areas. In a very large area, such as under a large deck, the animal may simply avoid the hazing techniques by moving its activity away from the hazing to another area under the deck. In this case, you’ll need to introduce enough light and noise to make the entire area undesirable. 
    2. Exclusion – Installing an animal-proof barrier around the porch or deck at the same time you are doing the hazing may help encourage the animal to relocate on its own, but will also prevent this animal, or other animals, from setting up housekeeping there in the future. If you don’t “animal-proof” the area, you are very likely to have another animal eventually move in. By “animal-proofing,” we mean installing a barrier that animals cannot chew through, pull apart, dig under, or climb over. Welded wire mesh or hardware cloth are usually good choices for this, since they are strong, long-lasting, easy to work with, are relatively inexpensive, and, except for welded wire mesh, are readily available at most hardware stores and home improvement centers. Welded wire mesh can be a little more challenging to find, but it is available from some farm and ranch supply stores, fencing retailers, and online. If you are shopping for welded wire mesh, look for 1” x 1” or 1” x ½” galvanized mesh made with 14.5 or 16-gauge wire.

      See the downloadable PDF linked at the top of this page for helpful photos and step-by-step instructions.

      Materials you will need:
      • Galvanized hardware cloth or welded wire mesh
      • Screws – we like 1 ¼” galvanized pan-head lath screws, but deck screws should also work
      • Fender washers – we like 1” diameter washers with a 3/16” hole

      Tools you will need:
      • Safety glasses
      • Leather gloves – to protect your hands from possibly sharp metal edges
      • Cordless drill/screwdriver with appropriate bit for driving the screws you will be using
      • Wire cutter, or sheet metal cutting shears (the latter works well for hardware cloth)
      • Long-handle or short-handle round-point shovel
      • Grub hoe or pick-mattock – optional for trenching in hard or rocky soil
      • Tape measure
      • Optional – for large jobs, you may want to rent an electric sheet-metal and wire-mesh cutting shears. Or, if you are working with welded-wire mesh, use an electric reciprocating saw with a metal-cutting blade to speed up the mesh-cutting process. 

      Instructions:
      1. Trenching – To keep animals from digging under the barrier you are installing, you’ll need to either dig an approximately 12” deep (or deeper) by 4-6” wide trench around your porch, deck, or shed and bury the lower portion of the wire mesh, or you’ll need to extend an “L”-shaped apron of wire mesh on the surface of the ground 12”- 18” out from the edge of the deck. If you choose the latter, you’ll need to place heavy bricks or rocks on top of the mesh or use landscape staples to hold it down. You can cover the surface mesh with a layer of soil, gravel, or mulch.
      For maximum effectiveness, combine the two methods by burying “L”- shaped mesh in a trench 12 inches underground and 12 inches out from the edge of the shed. 
      WARNING: Before trenching, check with your local utility provider to make sure it is safe for you to dig without hitting utility cables or pipes. In Wisconsin, call Digger’s Hotline at (800) 242-8511; or online at www.diggershotline.com

      2. Install mesh – Measure and cut pieces of mesh for your application. Bend and shape the mesh as needed to form an “L” to go around corners, to fit around obstacles, etc.
      Use the drill/driver, lath screws, and fender washers to attach the mesh to the lower edge of the deck or porch every 6 to 12 inches. When attaching mesh to concrete, such as where the deck meets the foundation of a structure, leave a few inches of extra mesh on that end. Bend the mesh into an “L” where it meets the wall, and use a masonry drill-bit and anchors made for using screws in concrete to attach the “L”-shaped “tab” on the end of the piece of mesh to the concrete. If you are using multiple pieces of mesh, be sure to overlap them by a couple of inches so that animals can’t get through any gaps between pieces of mesh. 
      IMPORTANT: At this point, do not completely mesh in the entire perimeter of the deck! Look for the place that the animal comes and goes from under the porch or deck. This spot usually has worn-down soil, grass, or other vegetation from the animal’s coming and going. Leave an opening in the mesh large enough for the animal to come and go from under the deck or porch. You will not close this opening until you are absolutely sure that no animals are still under the deck. If you choose to install a one-way door, this entry point is the best area to use it. 

      3. Begin Hazing – (see above for method). Continue for two or three nights, then test to see if the animal(s) have moved out (see next step).

      4. Newspaper Test – Loosely crumple several sheets of newspaper into a ball and stuff the ball into the opening you’ve left in the mesh around your deck. Then check the paper daily for the next three days to see if it has been removed from the hole. If the ball of paper has been removed, it means the animal is still using that entrance/exit. You’ll then need to continue the hazing techniques for a couple of more days and then try the newspaper test again. Repeat until you are satisfied that no animals remain under the deck or porch. Another way to check to see if the animal has left is a “trail camera.” These highly weather-resistant digital cameras automatically take a photo(s) or a clip of digital video when something passes in front of the camera. These cameras are sold at sporting goods stores and online. The camera should be placed so that it will be triggered by an animal going in or out of the opening under the structure. 

      5. Closure – once you are sure that no animals remain under the deck, securely close the opening you had left in the mesh.

      6. Monitoring – After you’ve repaired and animal-proofed your deck or porch, check back at least twice a day for at least the next three days to make sure that no animals have accidentally been closed inside and are unable to get out.

    A Note About One-way Doors 
    A one-way door (available online) is a device that lets an animal get out from under the deck or porch but not get back in through that door. A one-way door must NOT be used unless you are absolutely positive that there are no baby animals under the deck or porch. One-way doors are species-specific and must be installed correctly for maximum effectiveness. If you are unsure about the species living under your deck or shed, do not use a one-way door.

    A one-way door would be installed in the opening you’ve left in the mesh. A smear of peanut butter is placed on the inside surface of the door to attract the animal’s attention and help it discover that the door pushes open easily. Once the animal goes out the door, it will not be able to get back in. When you are SURE that all animals have exited the door, you can remove the door and close the opening in the mesh. 

    With a one-way door installed, if you see an animal desperately and persistently trying to get back into the excluded area, it may have babies inside. In this case, prop the one-way door open for 1-2 days or remove it entirely and resume hazing. This will give the mom an opportunity to move her young to a new location.

    *Caution: be very careful using a one-way door or the Newspaper Test to try to detect animal activity during the late fall, winter, and early spring. Some animals hibernate, and others greatly reduce their activity and “hole up” in a safe, relatively warm place for days or even weeks at a time when it is very cold or when there is deep snow. Do not do permanent repairs or install an animal-proof barrier until you are SURE that no animals will be trapped inside.

    “I don’t really want to go to all of the trouble of installing the exclusion mesh. Can’t I just do the hazing techniques to get the animal to leave?”

    Yes, you could try just doing the hazing without the exclusion. However, sooner or later, you are likely to have another animal, or maybe even the same animal, move in after you stop the hazing. There is always the option to hire a humane animal removal company to do the work for you. For more information on choosing the right company for the job, click here

  • Wildlife in My Chimney or Fireplace

    Wildlife in My Chimney or Fireplace

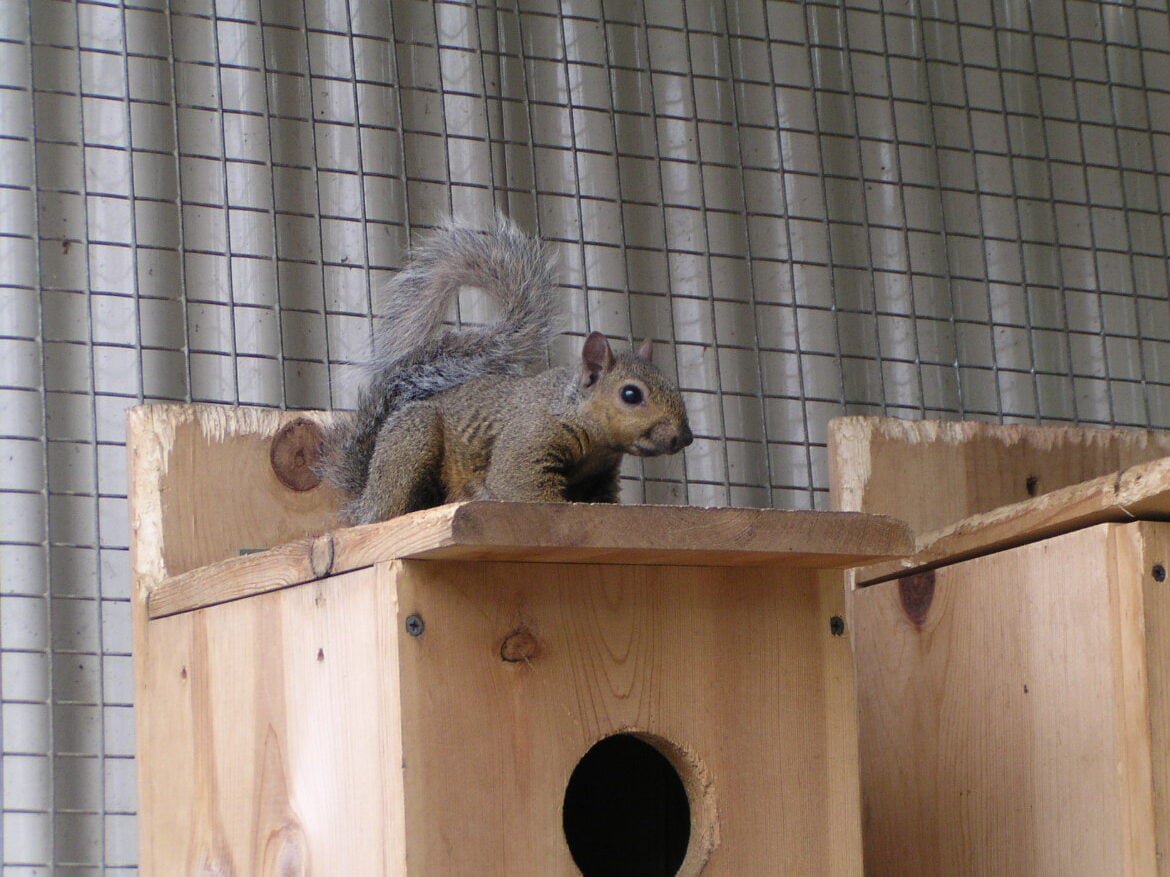
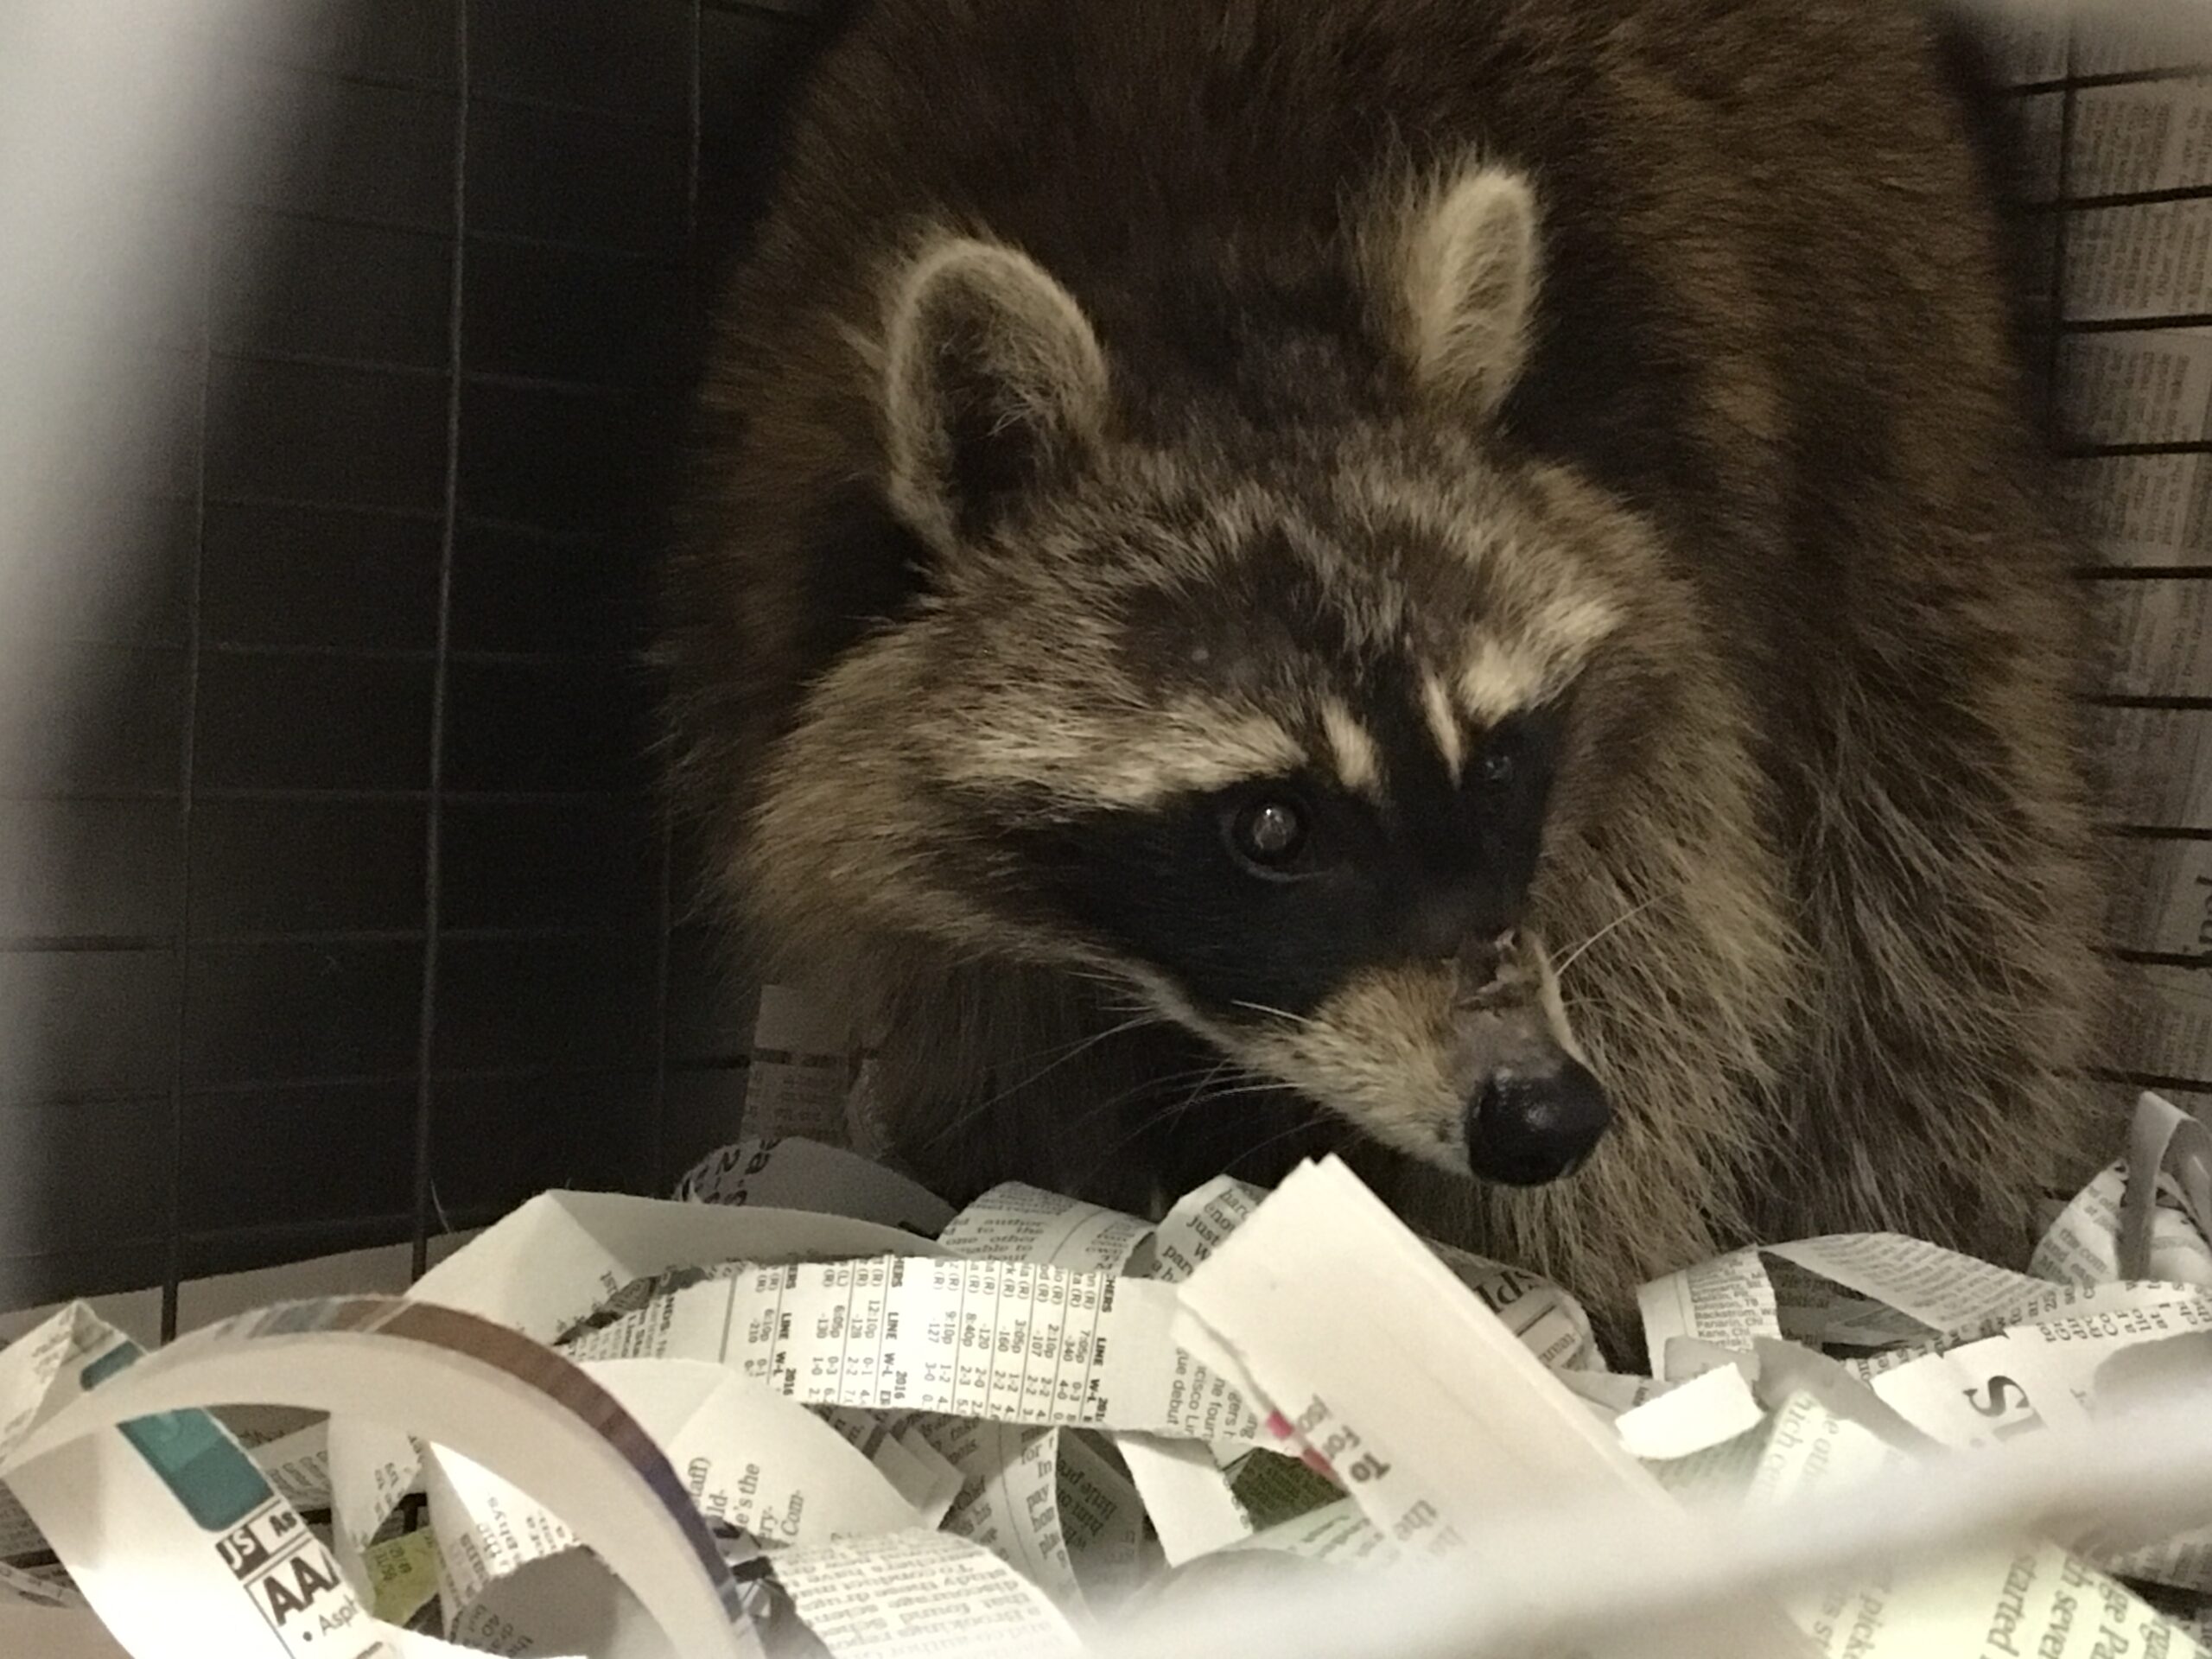
    Some species of wild animals are “cavity nesters,” that is, they normally look for holes in hollow trees in which to find shelter, or den space for raising their young. Open chimneys resemble a hollow tree enough to attract these species. Some animals, like raccoons, can usually climb in and out of a chimney at will. Other species, like squirrels, are seldom able to get out on their own. Any bird that gets into a chimney (other than Chimney Swifts, who build a small nest attached to the inside of the chimney) will NOT be able to get out on its own. These animals will die unless they are rescued or given an alternate means of exit. 


    FAQs & Humane Solutions:

    “How do I prevent wildlife from entering my chimney?”

    Install a chimney cap. A chimney cap is a metal mesh cover, usually with a peaked, solid top. You can get a professional chimney sweep service to install the cap, or, if you are able-bodied, handy, and have a suitable ladder, you may be able to install it yourself. If you are going to install a cap yourself, you’ll need to get up on our roof and measure the chimney opening so you know what size cap you’ll need. Before going on the roof, please take the time to set up your ladder properly so it can’t slip or fall (you may want to get someone to hold the ladder for you), hang onto the ladder with both hands when climbing and descending, wear shoes with non-slip soles, and stay off the roof when it is wet or snow-covered. Chimney caps for DIY-ers are available from home improvement centers, some hardware stores, and online. Avoid caps made from aluminum, since they are not as sturdy as steel caps, and a raccoon may be able to pull an aluminum cap off or pull it apart. Most caps don’t require any drilling and just fit onto the top of the chimney opening, then are held in place by screws. Before installing a cap, inspect your chimney to make sure that no animals are present. 

    “If I hear noise in my chimney and suspect it’s a raccoon, should I light a fire to drive the animal out?”

    Please DON’T. We have seen many cases of animals with smoke-inhalation and/or severe burns caused by people trying to smoke them out. If a raccoon family is present, the smoke usually drives the mother raccoon out in a panic, and she does not have time to evacuate her babies. The babies, and often the mother, suffer from smoke inhalation and get badly burned or even killed. 

    If you hear a raccoon with babies making “chittering” or “churring” sounds (sometimes crying, especially at night), take the following steps:

    Tolerance: If you are willing, you may choose to let her continue to tend to her babies in the chimney for a few weeks. She will not damage the chimney. To reduce the sound of the babies inside your house, you may want to temporarily place a piece of plywood or other sturdy panel over your fireplace opening. When the babies are about 8 weeks old, the “kids” begin following their mom on her nightly forays in search of food. At that point, she’ll usually move out, and you can then have the chimney capped.

    Hazing: If you’ve decided that you just can’t stand having the raccoons living in your chimney, you can encourage them to move out. Bear in mind, though, that this is not without some risk of the mother abandoning one or more of her babies. The raccoon moved into your chimney because it is relatively warm, dry, dark, quiet, and feels safe inside, much like a hollow tree.

    To get a raccoon to relocate, you’ll need to convince her that her chosen den site is no longer a quiet, safe place. To do this, place a portable radio on the floor or on the log rack in the bottom of the fireplace. Add a bright light, such as a mechanic’s trouble light or a floodlight that shines upward, next to the radio. Tune the radio to a rock-and-roll or talk-radio station and play it at a moderate volume. Keep the light and radio going from late afternoon through the night. You may turn the radio’s volume down when you are home if you can’t sleep with it on or you need a break from the noise. While you might wonder what good the light will do in this application, many fireplace dampers (the door that you close between the firebox and the chimney to keep out cold air when you are not using the fireplace), especially on older chimneys, do not form a completely light-proof seal around their edges, and so some of the light may get through to the raccoons.

    In many cases, the raccoon may move out or begin moving her babies after one or two nights of hazing. But sometimes it takes longer. Keep in mind that she can only carry one baby at a time, and her new den site may be quite a distance away, so it sometimes takes her more than one night to move all of her babies. After each 24-hour period of hazing, you may turn off the radio to listen for indications that the raccoons are still there. When you are certain that the raccoons have moved out, get your chimney capped right away to prevent future problems. IMPORTANT: If the animal in your chimney is a squirrel or a bird, hazing will not work because the animal cannot get out on its own. See our advice for these situations below.

    Hire Help: If you are unwilling to tolerate or unable to haze the animal yourself, there is the option to hire a humane animal removal company to do the work for you. For more information on choosing the right company for the job, click here

    “I hear fluttering sounds in the chimney above the fireplace, so I think there’s a bird stuck in there. What should I do?”

    A bird that has fallen all the way down to the bottom of your chimney will be unable to escape on its own and will die unless you give it another way out. To save this bird, you’ll need to open the damper during the daytime to let the bird come down out of the chimney and into the fireplace. But before you do this, close all of the draperies or blinds in the room and close any doors to adjoining rooms. Get people and pets out of the room and turn off sources of noise like the radio and TV set. Fully open either a door to the outside or a window. Then open the fireplace curtain or doors, turn out the room lights, open the fireplace damper (the flap between the top of the fireplace and the chimney), and leave the room or go sit quietly in a location where the bird cannot see you. The bird should soon see the light coming in and drop down into the fireplace through the damper and then out the open window or door to the outside. 

    However, if the bird that comes down out of the chimney and into the fireplace is covered in soot, appears to be injured or sick, or is a juvenile bird, call your local, licensed wildlife rehabilitator for advice. Sooty, injured, weak, or juvenile birds should be examined and treated by a wildlife rehabilitator.

    After an hour or so, if the bird does not come down through the damper, you may need to put on safety glasses (to protect against falling soot) and use a flashlight to look up into the fireplace to see if the damper opens wide enough for the bird to get out.

    Larger birds like Wood Ducks, screech owls, kestrels (small falcons), and even crows and Barred Owls have all been known to fall into open chimneys and need to be rescued. For these larger birds it is sometimes necessary to dismantle the damper door mechanism to allow the bird to be extracted through the damper opening.

    An alternative to letting a bird fly out of the house is to use a fine-meshed net, such as a butterfly net, to capture the bird while it is still inside the fireplace. To do this, open the fireplace curtain or doors just wide enough to squeeze through the opening with the net and try to net the bird and carry it in the net outside. One drawback to this technique is that the bird may become frightened by the net and fly back up through the damper and into the chimney. 

    “A squirrel fell into the chimney above my fireplace. What should I do?”

    If you tap on the damper and hear a loud “Ee-urrrrr” scolding sound and “tooth-chattering” noise, it’s likely a squirrel. The advice for helping a squirrel in this situation is largely the same as our advice for helping a bird in the same situation (see directly above). However, unlike the situation involving the trapped bird, you should not try to catch a squirrel with a net or by hand to remove it from the fireplace. And you should take extra care to remove breakable knick-knacks from tables and shelves before you let a squirrel out to run out of a door or window. Squirrels are very high-strung and will be very frightened. Once the fireplace doors are opened, the squirrel may bolt out of the fireplace, and if it doesn’t immediately see a way out, it may take a lap or two around the room until it notices the open door or window.

    If you don’t want to let the squirrel run out of an open door or window, use a live-trap in the fireplace instead. Bait the live-trap with a dab of peanut butter and place it in the fireplace. Keep it quiet in the room and in time, the squirrel’s fear should subside enough for it to come down from above the damper and check out the peanut butter in the trap. Once it is captured in the trap, carry the trap outdoors. Put the trap on the ground, point it away from hazards like the street, and toward the base of a tree. Open the trap door. The squirrel will zoom out of the trap and should shoot up the tree to safety.

    Caution: do NOT let a squirrel run out of the door or window if you are above the ground floor. The squirrel could become seriously injured or killed if it leapt from a high window or door and fell onto the pavement.

    “I hear an animal in the chimney down in my basement. What should I do?”

    Birds, squirrels, and sometimes even raccoons can get into a chimney for a basement water heater or an older-style furnace. Raccoons can typically get out of these chimneys. Birds and squirrels can’t and will need help, or they will die in the chimney.

    • Raccoon | A raccoon in this type of chimney is often a female looking for a den in which to have her babies. She is usually located at the very bottom of the chimney where it meets the basement floor. If you don’t mind her living in there for a few weeks while her babies are still quite small (she’ll need to find a larger den as the babies get bigger), you don’t need to do anything, except maybe put something heavy right up against the chimney clean-out door (see downloadable PDF at the top of the page for images). Sometimes, these clean-out doors can pop open unexpectedly when the raccoon leans on the door. Blocking the door should prevent this from happening.
      If you do want to get her to leave, place a portable radio with its speaker(s) right up close to the clean-out door. Tune the radio to a talk or rock-and-roll station. Play the radio starting in the late afternoon and all night. The raccoon will usually move out in a day or two. But make sure to check the chimney to be sure they have moved out before you cap it!
    • Squirrels or Birds | Birds or squirrels who have fallen this far down in a chimney will need to be let out of the chimney via the chimney clean-out door and then given a way out of the basement. Click here for advice on removing wildlife from your basement.

    An Important Message about Chimney Swifts

    Chimney Swifts are amazingly aerobatic, insect-eating birds of both big cities and small villages. Swifts rely largely on chimneys in which to nest and raise their young, and also as rest-stops during migration. Swift populations are declining significantly. No one is really sure why, but a lack of nesting sites may be a factor. If you cap your chimney to exclude other wildlife, you’ll be excluding swifts, too. To allow swifts to nest in your chimney, you could remove the cap when swifts arrive in the state in early May and put it back on at the end of September when swifts have left our state to winter in South America. 

  • Wildlife in My Basement

    Wildlife in My Basement

    In most cases, wild birds or mammals (other than mice) find their way into a basement by accident. They may come in through the chimney, furnace system, dryer vent, a broken door or window, or a door or window that has been left open. 

    The species most often encountered in basements in our area are Gray Squirrels, Eastern Chipmunks, House Sparrows, and European Starlings. For information about how to humanely deal with mice in your house, click here.

    Most animals will leave your basement on their own if you give them a way out. 


    FAQs & Humane Solutions:

    “I found a wild animal in my basement. How do I get the animal to leave?”

    Most animals will try to get out of your basement by exiting towards the light coming through windows or doors during daylight hours. Therefore, we recommend turning off the lights in the basement and opening as many windows as possible. Any windows that won’t open or you don’t want to open for security reasons should be covered with closed draperies or blinds, cardboard, or a blanket or towels so that the animal is not attracted to light coming in the closed window or door.

    If there is a doorway to the outside at the top of the basement stairs, you may also want to open this door. But before doing so, close any doors between rooms upstairs to keep the animal from making a wrong turn and ending up elsewhere in your home. 

    The animal recognizes the open door(s) or window(s) as exits and leaves within an hour or two. Keep people and pets out of the basement and minimize noise throughout the house so it doesn’t scare the animal into hiding. 

    A bird should be able to fly out of an open window or door, but a small mammal such as a chipmunk may not be able to climb up to the window to get out. To make it easier for a mammal to get out, give it something it can climb on that goes from the basement floor up to the open window. You can give the animal a ramp up to the window by propping up a long board, or you can attach a long sheet or blanket to the windowsill and let it hang down to the basement floor. Climbing animals like squirrels and chipmunks should be able to use this sheet or blanket as a ladder to climb up and out the open window. 

    If none of the windows or doors to the outside will open, or you don’t want to open them for security reasons, you’ll probably need to use a live-trap to capture the animal and carry it outside for release.

    “How will I know if the animal has left my basement?”

    It can sometimes be challenging to know whether or not an animal has left. If you had been hearing or seeing the animal prior to giving it a way out, and after providing an exit, you are no longer hearing or seeing it, there is a good chance it has left. 

    In situations involving chipmunks and squirrels, if you sprinkle a light dusting of baby powder or flour on the windowsill when you open the window, you may be able to see the animal’s footprints in the flour or baby powder if it leaves that way. 

    Listen carefully for activity in the basement over the next couple of days and watch for signs such as animal droppings, or items tipped over or otherwise disturbed that would indicate that the animal is still in the basement. 

    “I am unsure of how the animal got into my basement. How do I prevent this from happening again?”

    In our experience, most animals that get into basements come in through the chimney and through older furnace systems attached to the chimney. We recommend that chimney cap(s) be installed to keep wildlife out of chimneys and fireplaces. A chimney cap is a wire mesh and sheet metal cover that fits over the top of the chimney pipes outside of your home. 

    Once in the chimney, an animal may get into the basement through a loose clean-out door at the base of the chimney. In older homes, these are often rusted and the mortar and bricks around them may be crumbling.

    Wildlife can also enter the basement through the clothes dryer vent. A dryer vent guard to keep wildlife out is inexpensive and usually easy to install. Once installed, check the guard regularly to clear away any dryer lint that may accumulate.

    Broken basement windows or basement windows that don’t latch securely are another way that wildlife may be able to enter your basement. Repair any broken windows and inspect window latches to make sure they latch securely.

    “There is an animal in my dryer vent pipe. How do I get him out?”

    Chipmunks and other small rodents occasionally get trapped in the pipe running from your dryer to the outside of your home. If this is the case, you have two options:

    1. Disconnect the vent pipe from the back of the dryer. In most cases, the chipmunk should be able to exit the vent pipe into the basement (minimize noise and keep pets and people out of the basement so the chipmunk will not be too afraid to come out). Once the animal has exited the pipe or the dryer, you will need to either give it a way out of the basement or live-trap it and release it outdoors (see the techniques we described above for removing an animal from your basement).
    2. Disconnect the outdoor-end of the vent pipe and stuff the opening of the pipe with a towel or firmly crumpled ball of newspaper. Then disconnect the pipe from the back of the dryer and stuff that end with a towel or newspaper as well. Carry the entire ventilation pipe outside and remove the plugs from each end. The chipmunk should run out of the tube. Then take the tube back indoors and reconnect it to the dryer and the exterior vent. (Note: There is a chance that the animal may be in the dryer itself and not in the tube. In that case, proceed with the method described in the paragraph above.)

    Once the animal is out of the vent pipe, install a dryer vent guard to prevent this from happening again. 

  • Wildlife in the Attic or Eaves

    Wildlife in the Attic or Eaves

    Wild animals survive by constantly searching for and utilizing the resources they find in their environment. They interpret a loose or missing fascia board on your home’s overhang or a hole caused by water damage in the side of your house as a “Welcome” sign. They are not aware that they are trespassing; they only know that there is an entry hole that lets them get into a relatively warm, dark, safe and quiet place; out of the elements and safe from potential predators.

    Animals like Gray Squirrels and Raccoons usually gain access through holes in loose, missing, or rotten soffit, fascia, or roof boards. If these areas are not already rotted through, they may scratch or gnaw the rest of the way through — this rot is often the result of previous water or ice damage. Animals also enter through attic vents of various types. Squirrels may gnaw through wooden vent covers, and raccoons may tear open the vent cover to get inside. Trees with trunks or branches that are close (within 6-10 feet) to your structure often serve as a ready means of access for these animals to climb up to your attic or eaves. Or, an animal may climb up a downspout or a brick wall or chimney to get access to vulnerable parts of your home.


    FAQs & Humane Solutions:

    “I have an animal in my attic. Will you come out here and remove it, or can I rent a live-trap from you so I can trap it myself?”

    No. We have a much better solution to offer: Experience with thousands of such situations over many decades has shown us that the self-help techniques we describe below are much more humane than trapping and relocating an animal, provide a more ecologically-sound solution than relocation, and are more likely to provide you with a lasting solution at far less expense than removal/relocation. 

    “I have an animal in my attic. What can I do to get it to leave?”

    Hazing – You can do what we call “hazing” to get the animal to leave. Hazing involves temporarily converting that dark, safe, quiet wildlife haven inside your attic or eaves into a bright, noisy, smelly area in which the animal no longer feels comfortable or safe. The supplies that will be needed are: a bright light such as a mechanic’s trouble light or a floodlight, a portable radio, and either a commercial non-toxic animal repellent spray or granules such as Critter Ridder®, Expel®, or Repels-All®, or rags drenched in household ammonia.

    IMPORTANT: In cases where there may be baby animals present, we recommend that if possible, you wait until the young are old enough to leave the nesting area before you start hazing. There is a small chance that the hazing could get a mother animal to abandon her young or mistakenly not take all of her young when she moves out. And birds cannot move their eggs or young to a new location, so you should not use hazing techniques on birds during their nesting season. Use of hazing techniques may cause a parent bird(s) to abandon nestlings, which is inhumane and in the case of native migratory birds, may be against state and federal laws. In southern Wisconsin, Gray Squirrels may have young as early as March and as late as September. Raccoons may have young as early as April and as late as September.

    Hazing Technique – Set up the light inside the structure, ideally about five feet away from the entrance hole, and turn it on, shining toward the entrance. Caution: keep power cords away from the entrance itself or the animal may gnaw on the cord! Make sure the light cannot tip over and that it is not hot enough or close enough to anything flammable that it could start a fire! If possible, place the radio within several feet of the animal’s “den” or about five feet away from the entrance hole, again, inside the attic. Tune the radio to a talk station or a rock-and-roll station and have it on a moderately loud volume. If possible, place rags drenched in household ammonia or commercial non-toxic animal repellent just inside the animal’s entrance hole. The animal might leave the first night you do this, but you’ll probably need to keep this up for three days in a row, or perhaps longer. You can turn the radio off or turn the volume down periodically if the noise gets to be too much for you or your neighbors. The ammonia on the rags will evaporate, so you’ll need to re-wet them with fresh ammonia once or twice a day.

    Note: hazing works best in relatively small areas such as the attic of a small house. In a very large area, such as the attic of an apartment building, the animal may simply avoid the hazing techniques by moving its activity away from the hazing to another part of the attic. In this case, you’ll need to introduce enough light and noise to make the entire area uninhabitable. 

    “Once I have done the hazing, how do I know if the animal is gone?”

    To determine if the animal is gone, loosely crumple newspaper into a ball and place it in the animal’s entry hole into the attic or eave. If the newspaper is not disturbed after three days, the animal MAY have moved out. However, this method is only reliable if there is no other place that the animal can get into the attic or eaves.

    Caution: Be very careful using this technique to detect animal activity during the late fall, winter, and early spring. Some animals hibernate, and others greatly reduce their activity and “hole up” in a safe, relatively warm place for days or even weeks at a time when it is very cold or when there is deep snow. Do not do permanent repairs or install an animal-proof barrier (more about this below) until you are SURE that no animals will be trapped inside! 

    Another option for checking to see if the animal has left is a “trail camera.” These highly weather-resistant digital cameras automatically take a photo(s) or a clip of digital video when something passes in front of the camera. These cameras are sold at sporting goods stores and online. The camera should be placed so that the “shutter” will be triggered by an animal going in or out of the opening in the structure.

    “Once the animal has left, how can I prevent it or another animal from getting back inside?”

    You are right, once this animal leaves and the hazing stops, if you don’t “animal-proof” the area you are very likely to have another animal eventually move in. By “animal-proofing,” we mean installing a barrier that animals cannot chew through, pull apart, dig under, or climb over. Welded wire mesh, hardware cloth, or chicken wire are usually good choices for this, since they are strong, long-lasting, easy to work with, are relatively inexpensive and, except for welded wire mesh, are readily available at most hardware stores and home improvement centers. Welded wire mesh can be a little more challenging to find, but it is available from some farm and ranch supply stores, fencing retailers, and online. If you are shopping for welded wire mesh, look for 1” x 1” or 1” x ½” galvanized mesh made with 16 gauge wire.

    Materials you will need:

    • Galvanized hardware cloth, or welded wire mesh, or chicken wire
    • Screws – we like 1 ¼” galvanized pan-head lath screws, but deck screws should also work
    • Fender washers – we like 1” diameter washers with a 3/16” hole 

    Tools you will need:

    • Safety glasses
    • Leather gloves – to protect your hands from possibly sharp metal edges
    • Cordless or corded drill/screwdriver with appropriate bit for driving the screws you will be using
    • Wire cutter, or sheet metal cutting shears (the latter works well for hardware cloth)
    • Optional – for large jobs, you may want to rent an electric sheet-metal and wire-mesh cutting shears. Or for cutting welded wire mesh, use an electric reciprocating saw with a metal-cutting blade to speed-up the mesh-cutting process.

    Instructions:

    1. Cut the mesh to fit. Measure the width and length of the piece(s) of mesh you’ll need. Make the piece of mesh a few inches in each direction larger than the hole. Cut the piece and fit it into place. Trim and/or bend the piece as needed until it fits properly.
    2. Install the wire mesh. Use the drill/driver to install the mesh to the structure over the hole or the repaired area using the lath screws and fender washers. To do this, hold the mesh in place and drive the screw through a washer and the mesh to anchor the mesh to the structure. Use as many screws and washers as are needed to securely hold the mesh in place.
    3. Animal-proof other possible entry points. With the entry hole gone, animals may look for other weak points on your structure that they can use to get inside. These weak points are often areas of water-damaged or rotted wood, loose trim boards or siding, and flimsy or missing vent covers. Proactively install wire mesh over these areas to keep animals from gnawing through or tearing open these weakened spots. Pay careful attention to corners – anywhere that two walls or panels meet — such as under overhangs, outside corners of the fascia, where gables meet the roofline, etc. 

    IMPORTANT: Don’t trim branches or trunk-wrap a tree with sheet metal during the nesting season, which for some animals, like Gray Squirrels, can run from April through September, unless you are sure there are no baby animals inside your home! Trimming branches could prevent a mother animal from getting back to and caring for her young. Of course, this would be inhumane and could result in the deaths of the babies, leaving you with the unpleasantness of having dead animals in your attic or eaves.

    “I’ve heard that a one-way door can be used to let an animal living in an attic, eave, or wall get out, but not get back in. Can I use this to get the squirrels out of my attic?”

    One-way doors, especially when put in place a couple of days after hazing techniques (see above) have begun, can be helpful. But one must be very careful when using these devices to make sure that a mother animal is not prevented from getting to her babies. And if installed without concurrently using hazing techniques and proactively applying animal-proofing on other vulnerable areas of the structure, can lead to an animal getting back into the structure through a different weak spot.

  • Humane Mouse Control

    Humane Mouse Control

    House Mice are commensal animals. “Commensal” literally means “at the same table.” This means they rely heavily on humans, human-made structures, and human food supplies for survival. House mice are not native to North America; they came to this continent as stowaways on immigrant ships coming here from Europe.
    House Mice aren’t the only mouse species that get into people’s homes. In Wisconsin, native Deer Mice (Peromyscus maniculatus) and White-Footed Mice (Peromyscus leucopus) may also enter structures, though they tend to keep to less-developed areas adjacent to woods and fields rather than in big cities. These native species are usually a bit larger than House Mice, and they generally appear more brownish and have larger, bulging eyes. These mice are less likely to raid the pantry for human food sources; rather, they tend to spend their time in areas of the home with the least amount of human activity, like the attic, wall cavities, and low-traffic areas of the basement.


    FAQs & Humane Solutions:

    “I’ve seen mice in my house. They are getting into my cupboards and eating my food, and their poop is all over the place. What can I do?”

    There are three components to a humane and successful household mouse control program: Exclude, Secure, and Evict. 

    1. Exclude: For long-term success, you need to exclude mice from getting into your house. Go outside and walk around your house, looking for holes or cracks in the outside walls, especially in the foundation. Pay special attention to where pipes or wires — such as those for central air-conditioning or sump pumps — pass through the walls. Go into the basement in the daytime and turn the basement lights off. Look near the top of the basement wall for any light coming in. Close any holes larger than 1/4 inch with hardware cloth or fill with steel wool and sealant. You can use sheet metal to close gaps, as well. You could also hire a humane wildlife control company to close off all active and potential entry points around your home. Make sure to verify that they do not use rodenticide (poison) and that the eviction process includes installing one-way doors at entry points to make sure that mice do not get trapped inside.
    2. Secure: Investigate all potential food sources for mice in your home. This includes items stored in the pantry, basement, garage, as well as dirty stove tops, spilled pet food, or grills. Secure all food in metal or glass containers with tight-fitting lids. This includes pet food, human foodstuffs, bird seed, and grass seed. Clean up any spilled food right away. Remember, mice are small, so leaving one kibble of spilled dog food for a mouse to find would be like leaving a basketball-sized chunk of food for a human. 
    3. Evict: With mouse entries and exits now closed or with one-way doors installed and potential mouse food supplies contained in mouse-proof containers, your final step is to evict the mice that you still have in your house. For this, we recommend the Victor Tin Cat humane mouse live-trap, available here. Bear in mind that, given their commensal nature, any mice you evict will likely enter another non-mouse-secured structure in order to survive.

      Live-Trapping Technique: For best results, place the live traps against walls (mice like to travel along walls for safety and security) close to where you have seen mice or evidence of their presence. Bait the live traps with peanut butter and/or seeds, shelled nuts, bread, bits of chocolate, or dry dog or cat food. Mice can be fickle; most will readily go for peanut butter, but others can be fussier about their food choices. Also, place a small jar lid full of fresh drinking water for the mouse/mice in the live trap. Once they are set, it is important that you check these traps often, at least every 8 hours, and liberate any trapped mice outdoors as soon as possible.
      Keep trapping until you no longer catch mice. If you suspect that you still have mice in the house but they are ignoring the traps, try changing the type of bait you are using, or stop trapping for a few days and then start up again. It can also help to change the locations of your traps every few days. 

    “Where should I release the mice I catch?”

    Because House Mice are commensal animals, we recommend releasing your uninvited guests near your home since they are familiar with the resources around your dwelling. But make no mistake, when you remove the mice from your home and release them, they will not suddenly become “field mice” and live from then on in the woods and fields; they will sooner or later enter another human-made structure near the release site. But, if you have done a good job of exclusion, they won’t be able to get back into your house.

    For humane reasons, please do not evict mice during severe weather, such as storms or periods of deep snow or bitter cold. If you have any questions, you may call the WHS Wildlife Rehabilitation Center at (414) 431-6204. 

    Note: Please DO NOT use glue traps or ‘sticky’ traps! These traps are very inhumane. They leave an animal to die of dehydration, starvation, or exhaustion as it struggles for hours or even days to escape the glue. Some animals will break their legs or even chew off limbs in an effort to escape.

  • Trapping and Relocating Wildlife

    Trapping and Relocating Wildlife

    Though sometimes touted as a quick solution to conflicts with “nuisance” animals, trapping and relocating wildlife seldom provides a lasting solution to such problems. Furthermore, it often causes baby animals to become orphaned and thus die, and studies indicate that relocated animals may not survive long after relocation. 


    FAQs & Humane Solutions:

    “I have a wild animal causing a problem in my yard. Will you come out here and remove it, or can I rent a live-trap from you so I can trap it myself?”

    The answer to both questions is “No,” because we have much better solutions to offer: Experience with thousands of such situations over many decades has shown us that the self-help techniques we describe in the links below are much more humane than trapping and relocating an animal, provide a more ecologically-sound solution than relocation, and are more likely to provide you with a lasting solution at less expense than removal/relocation. 

     “Why doesn’t trapping and relocating an animal provide a long-term solution?”

    There is a saying: “Nature abhors a vacuum.” This is certainly true when it comes to wildlife relocation. If you trap and remove one animal, another will likely move into the “vacuum” you created when you removed the first animal from its territory. This fact was illustrated perfectly in a newspaper story a few years ago. The story profiled a man from our area who live-trapped and relocated nearly every wild animal that happened into his yard. After ten years of trapping and removal, this person had moved hundreds of gray squirrels and dozens of other animals, such as raccoons, woodchucks, and opossums. Of course, this man did not have 300 squirrels living in his yard at one time, but moving one animal out made room for others. These are often young animals moving out of their parents’ territory to find their own.

    We have seen this sort of thing happen countless times, but to give you just one other example: someone had an animal removal service trap and remove Gray Squirrels that were getting into their attic. These folks paid hundreds of dollars to have the removal company trap and remove seven gray squirrels from their yard. This seemed to solve the problem temporarily, but within six months, they had squirrels getting into their attic again because the real cause of the problem, an unscreened attic vent that let the squirrels get access to the attic, was not addressed.

    “Why would trapping and removing animals cause babies to become orphaned?”

    The usual scenario is that someone traps and removes a wild animal from their property for one reason or another, and then the next day or even days later, hears the weak, hungry cries of the babies that were left behind in the mother’s hidden den. These babies will not survive without their mother’s care. Using the humane nuisance-resolution techniques we illustrate in the links at the end of this article rarely causes a mother to abandon her babies and gives her time to safely relocate her young. 

    “Why would trapped animals have a hard time thriving after they are relocated?”

    A relocated animal does not know where food, water, and shelter are located, and is not aware of dangers such as predators in this new area. It also has to compete with others of its kind to establish a new territory of its own. Animals such as squirrels that cache food for the winter will almost certainly die if they are trapped and relocated during the winter.

    A key factor in the post-release survival of relocated animals is the quality of the habitat at the release site. One review of several relocation studies concluded that relocations to “poor-quality habitats” can result in survival rates averaging only 38%. “Translocations made by well-meaning, but poorly-informed and untrained private citizens, are unlikely to give adequate consideration to habitat and other factors.” (Translocation as a species conservation tool: status and strategy. B. Griffith, J.M. Scott, J.W. Carpenter, and C. Reed. 1989. Science 245: 477-480).

    In one study of urban and suburban Gray Squirrels that were trapped and relocated to a forest, 97% of the squirrels were dead or had disappeared from the release area within 88 days. (Movement and mortality of translocated urban-suburban grey squirrels. L.W. Adams, J. Hadidian, and V. Flyger, in Animal Welfare 2004, 13: 45-50).

    In one study of relocated raccoons, the authors determined that there was a 50% mortality rate at three months post-release. They further concluded that mortality may have been as high as 75% after one year. (Relocation of city raccoons. R.C. Rosatte and C.D. MacInnes. 1989. Proceedings of the Great Plains Wildlife Damage Conference 9: 87-92). 

    “So what else can I do besides trapping and removal to solve my wildlife problem?”

    We have a wealth of resources on our website. Our resources focus on identifying root problems (what, specifically, is the problem, and why is the animal doing what it is doing?) and offer humane, cost-effective, sustainable, and biologically sound methods for resolving conflicts with urban-suburban wildlife.